How to Create a Landing Page in WordPress (5 Easy Steps)
 Stacey Corrin
Stacey Corrin
Stacey Corrin
 John Turner
John Turner
John Turner

TL;DR: How to Create a Landing Page in WordPress
Creating a WordPress landing page takes about 15 minutes with the right plugin. Here’s the short version:
- Install SeedProd: Buy and activate the plugin, then enter your license key in WordPress.
- Create a new page: Click “Add New Landing Page” from the SeedProd dashboard.
- Choose a template: Pick from 300+ templates and open it in the drag-and-drop editor.
- Connect email marketing: Link your email service so new subscribers are added automatically.
- Publish: Click Publish and your landing page goes live on your WordPress site.
If you’ve ever sent ad traffic to your homepage and wondered why nobody converted, a landing page is the fix. Whether you’re building a giveaway entry page, a lead magnet offer, or a product launch page, you need a dedicated page built for one goal, not ten.
I’ve built dozens of WordPress landing pages over the years, and they’ve been one of the fastest ways to grow my email list and sales. In this tutorial, I’ll show you how to create a landing page in WordPress using a beginner-friendly drag-and-drop builder, with no coding required.
Quick steps to build a WordPress landing page:
- 1. Install and Activate SeedProd
- 2. Create a Landing Page
- 3. Customize Your Template
- 4. Connect Email Marketing
- 5. Publish Your Landing Page
What Is a Landing Page in WordPress?
A WordPress landing page is a single, focused page designed to get visitors to take one specific action, like signing up for a newsletter, buying a product, or downloading a free resource.
Unlike your homepage, which introduces your brand and links to many different pages, a landing page removes distractions and keeps visitors focused on a single goal.
You might also hear them called squeeze pages, opt-in pages, or lead capture pages. They all refer to the same concept: a stripped-down page with one job.
You can use landing pages in WordPress to drive targeted traffic from your marketing campaigns and turn more visitors into customers. Common uses include:
- Email marketing campaigns
- Paid advertising on Google or Facebook
- Social media promotions
Because landing pages have just one goal, they’re ideal for maximizing conversions. Keep the design simple and engaging, and make sure your call-to-action (CTA) buttons and forms are easy to see and click.
What Is the Difference Between a Landing Page and a Homepage?
The difference is simple: a landing page is built for one specific goal, while a homepage serves many purposes.
A WordPress landing page focuses entirely on conversions. It has a single call to action, no extra navigation, and fewer distractions, making it ideal for ads and email traffic.
Your homepage, however, introduces your brand and links to many parts of your site. This broader focus makes it less effective for generating immediate leads or sales.
How to Create a Landing Page in WordPress
You might think that creating a landing page in WordPress is complicated and involves writing lots of code. But if you use a WordPress landing page plugin, you’ll find it’s relatively easy, even if you’re not a developer or design expert.
There are various landing page builder plugins on the market, such as Elementor, Beaver Builder, and more. However, they don’t all offer the ease of use and features you need. That’s why we put together this list of the best WordPress landing page plugins where you can choose your favorite to build your page.
This tutorial will show you how to create a landing page in WordPress using SeedProd. SeedProd is the best visual website builder for WordPress.
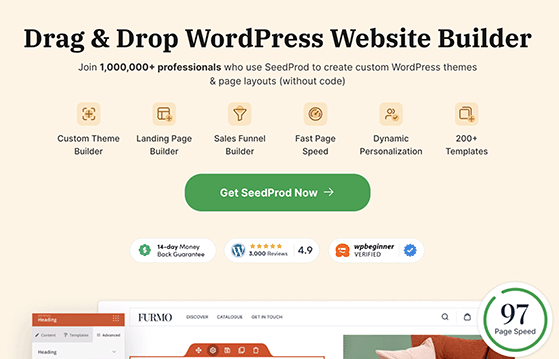
It comes with a drag-and-drop builder, 300+ landing page templates, and ready-made blocks designed to optimize your page content and boost conversions.
In my own GTmetrix testing, a SeedProd landing page loaded in 556ms with 16 HTTP requests, compared to 1,882ms and 32 requests for the same page built with Elementor. You can see the full comparison in my Beaver Builder vs Elementor vs SeedProd test.
SeedProd can also generate a complete WordPress website in about 45 seconds using its AI site builder.
You can also use SeedProd to create custom WordPress themes and WooCommerce websites with its drag-and-drop builder with zero coding know-how. It automatically makes the parts of your theme for you, including your header, footer, sidebar, homepage, and more.
This tutorial covers WordPress.org (self-hosted). If you’re on WordPress.com, the plugin options and steps differ.
Follow the steps below to learn how to create your first landing page in WordPress with SeedProd.
How Do I Install SeedProd to Build Landing Pages?
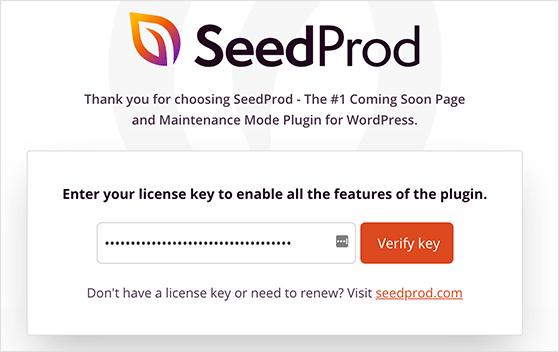
The first step is to visit the SeedProd website and buy the SeedProd plugin. You can then download the plugin to your computer and copy the plugin license key from your SeedProd account area.
Next, log into your WordPress dashboard and install the plugin. If you need help, follow this step-by-step guide to installing a WordPress plugin.
Once the plugin is installed on your WordPress site, don’t forget to activate it.
After activating SeedProd, you’ll see a welcome screen asking you to enter the plugin license key. Enter the license key you copied earlier from your SeedProd account area and click the Verify Key button.
Once your license key is verified, scroll further down the page and click the Create Your First Page button.
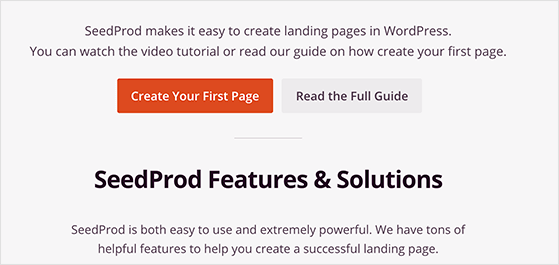
After clicking, you’ll head to the SeedProd dashboard, where you can start creating your new landing page without writing CSS, PHP, or installing a child theme for WordPress.
How Do I Create a New Landing Page?
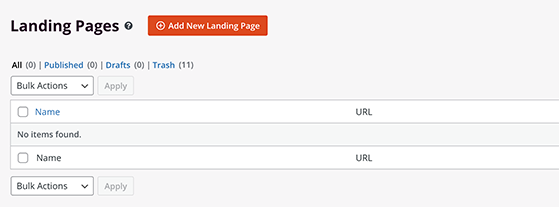
On the SeedProd dashboard, you’ll see 5 different options for creating your landing page design. Along the top are options for coming soon mode, maintenance mode, a 404 page, and a login page.
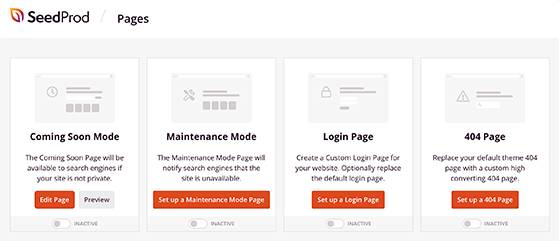
Below that section is the option to create a landing page. Click the + Add New Landing Page button to make your first page.
SeedProd landing pages aren’t automatically added to your navigation menu. They stay separate from your main site, which is ideal if you’re driving paid traffic.
You’ll then have the option to choose a landing page template. SeedProd offers 300+ landing page templates, including:
- Squeeze page
- eCommerce sales page
- Webinar registration
- and more
Alternatively, you can choose the blank template to start from scratch.

To choose a template, hover your mouse over it, and click the tick icon. This opens the template in SeedProd’s visual editor, where you can customize the content.
How Do I Customize My Landing Page Template?
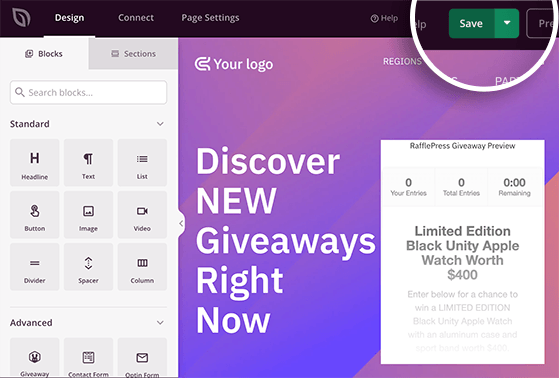
SeedProd’s landing page builder shows you a live preview of every change you make.
There are landing page blocks and sections you can add to your design on the left-hand sidebar. And on the right side, you can see how your landing page looks with the live preview.
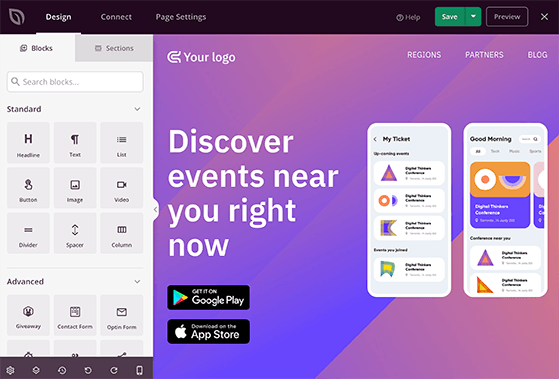
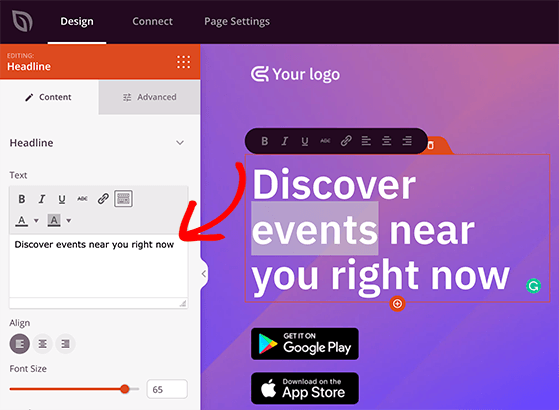
Customizing your landing page is straightforward. You can point and click any element to tweak the settings and styles and see the changes in real-time.
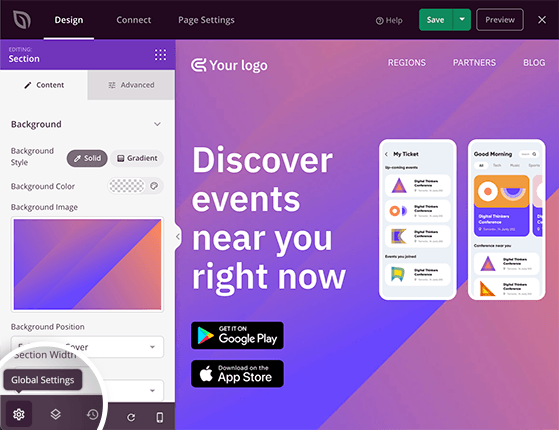
If you want to change the fonts, colors, background images, and background colors across the entire page, click on the Global Settings button in the bottom left corner. You can even choose from various premade color combinations and font pairings for a unified look and feel.
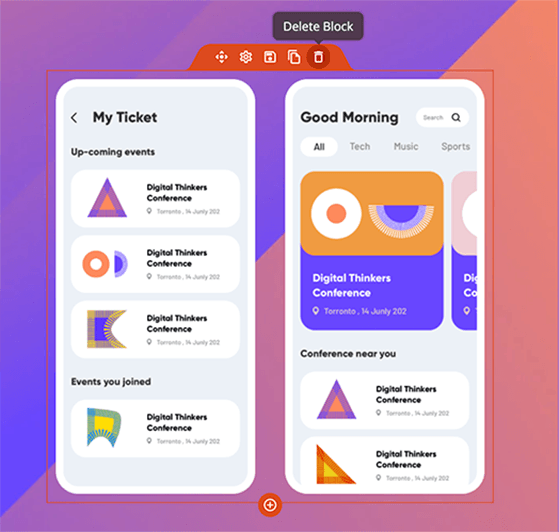
If you find that you don’t need some of the landing page blocks included in your template, you can delete them by hovering your mouse over the block and clicking the trashcan icon. You can also duplicate a block in the same area, move it, change the block settings, or save it to use again.
Adding extra features to your landing page is just as easy. SeedProd offers 90+ landing page blocks focused on lead generation and conversions.
Here’s a quick overview of SeedProd’s blocks:
Standard Blocks
These are simple page elements almost all landing pages have, including:
- Headline
- Text
- List
- Call to Action Button
- Image
- Video
- Divider
- Spacer
- Column
Advanced Blocks
These blocks are focused on generating leads, sales, and conversions for your business, such as:
- Giveaway (RafflePress)
- Contact Form
- Optin Form
- Countdown Timer
- Social Profiles
- Social Sharing
- Animated Headline
- Progress Bar
- Icon
- Testimonials for social proof
- Image Box
- Icon Box
- Nav Menu
- Pricing Table
- Anchor Links
- Star Rating
- Google Maps
- Facebook Blocks
- Custom HTML

WooCommerce Blocks
SeedProd’s WooCommerce blocks are designed to work seamlessly with your online store and existing WooCommerce installation. They allow you to add products to your landing page and show:
- Add to Cart Buttons
- Checkout
- Cart
- Products Grid
- Recent Products
- Sale Products
- Best Selling Products
- Featured Products
- Top Rated Products
To add new content to your template, drag a landing page block from the left side of your screen and drop it onto your template on the right.
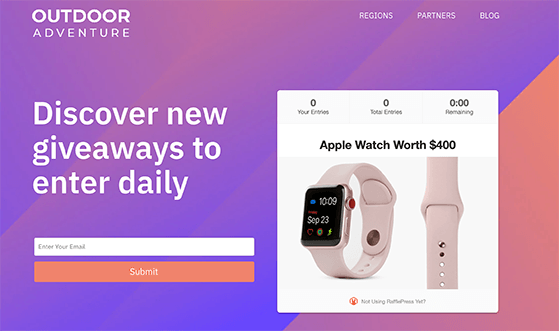
For example, you can add a RafflePress giveaway to promote your online contest and attract many giveaway entries. To customize any block you add to your page, click on it to see the different content, styles, fonts, colors, and template options on the left side of your screen.

When you’re happy with how your landing page looks, click the Save button in the top right corner.
How Do I Connect Email Marketing to My Landing Page?
If you decide to add an optin form to your landing page to start building your email list, you’ll need to connect your email marketing service.
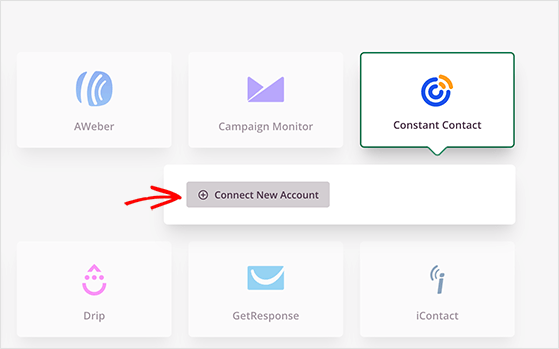
SeedProd integrates with many popular email marketing services like Constant Contact, Mailchimp, Get Response, and more. To access integrations for your favorite provider, click the Connect tab at the top of the screen.
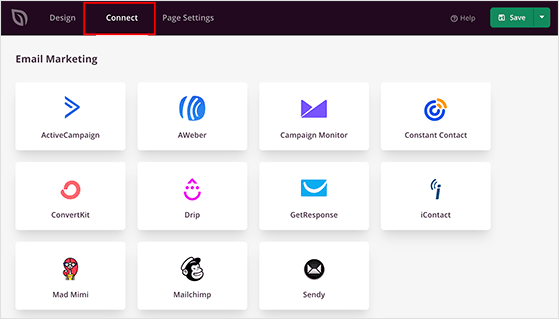
Next, find your email service in the list and click Connect New Account. You can then follow the instructions to connect and verify your account.
Now, every time you collect email addresses via your landing page form, they’re automatically added to your email list.
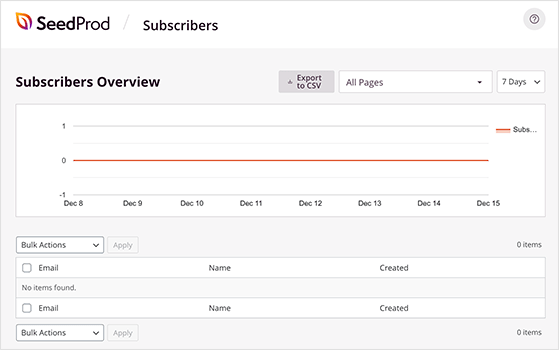
If you don’t currently have an email list, you can manage your subscribers right inside SeedProd. When you head to SeedProd » Subscribers, you’ll see the details of everyone who subscribes in the subscriber management dashboard.
Pro Tip: Click the Page Settings tab to configure your general, SEO, Analytics, and script settings with a few clicks.
How Do I Publish My Landing Page in WordPress?
After customizing your template and connecting your email list, it’s time to make your landing page live on your WordPress site. To publish your landing page, click the dropdown arrow next to the Save button and select Publish.
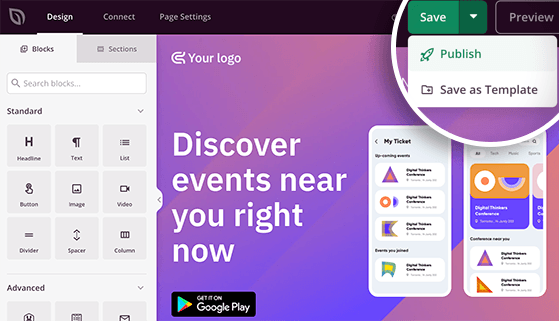
After clicking Publish, you’ll see a popup message telling you your page is now live.

Go ahead and click the See Live Page button to view your landing page.
And that’s it! You’ve now created a WordPress landing page in 5 easy steps.
How Do I Set a Landing Page as My WordPress Homepage?
To set a landing page as your WordPress homepage, go to Settings → Reading → A static page, then select your landing page from the dropdown.
Save your changes and clear your cache. The landing page will now load when visitors arrive at your domain.
Free: Download Our Giveaway Playbook
Templates, prize ideas, and promotion strategies in one guide.
Best Practices for High-Converting WordPress Landing Pages
The best way to increase conversions on a WordPress landing page is to keep it simple, remove distractions, and guide visitors toward one clear action.
Match Your Headline to Your Ad Copy
When your headline matches the ad a visitor clicked, they know immediately they’re in the right place. For a sales page or product launch, mirror the exact language from your ad so the experience feels seamless.
Write a headline that explains the benefit of your offer in one sentence. If visitors have to guess what the page is about, you’ve already lost them.
Place Your CTA Above the Fold With One Goal Per Page
Put your main button or form where visitors can see it without scrolling. Keep forms short, ask only for what you need, and remove navigation links to keep visitors focused on one action.
Avoid multiple goals on the same page. Every extra link or option is a distraction that reduces the chance someone takes the primary action you want.
Add Social Proof Near the CTA
Testimonials placed within two scrolls of your opt-in form can significantly reduce hesitation. Real reviews, star ratings, or a customer count give visitors a reason to trust you before they commit.
SeedProd’s Testimonials block makes it easy to add social proof right next to your CTA without any custom code.
Optimize for Mobile Before You Publish
SeedProd pages are mobile-responsive by default, but check your button sizes and form field spacing on a phone before you publish. Small touch targets and cramped forms are the most common conversion killers on mobile.
You can also run A/B tests on headlines and CTAs to find what converts best for your audience. Test one change at a time so you can pinpoint what’s actually making the difference.
How to Drive Giveaway Entries With a Landing Page
The easiest way to boost giveaway entries is to send all contest traffic to one dedicated page, not your homepage.
When visitors land on a page built around a single giveaway, there’s nothing to distract them from entering. No navigation menu, no other blog posts, no unrelated offers. I’ve used this setup for product launch giveaways and subscriber growth campaigns, and the focused page consistently outperforms sending people to a general site page.
The RafflePress Giveaway block from Step 3 works best this way. Once it’s on a dedicated SeedProd page, your paid ads, email links, and social posts all point to one clean entry point.

For inspiration on what these pages look like, check out these giveaway landing page examples that have driven thousands of contest entries.
Ready to add a giveaway to your landing page? Get started with RafflePress and build your first contest page today.
FAQs About Creating Landing Pages in WordPress
Is WordPress good for landing pages?
Yes. WordPress is one of the best platforms for landing pages because you control the design completely, there are no platform fees, and dedicated plugins like SeedProd give you a drag-and-drop editor with 300+ conversion-focused templates. You can build a landing page on your own domain without any limitations.
How can I create a simple landing page in WordPress?
The fastest way is to install SeedProd, click Add New Landing Page, pick a template, and publish. You don’t need to write any code. The whole process takes about 15 minutes, and SeedProd’s visual editor shows you exactly how the page looks as you build it.
What is the best landing page builder for WordPress?
SeedProd is the top choice for most WordPress users. It’s beginner-friendly, includes 300+ templates, and has conversion-focused blocks like countdown timers, optin forms, and giveaway integrations. In my GTmetrix testing, SeedProd pages loaded in 556ms compared to 1,882ms for Elementor.
How do I set a landing page as my WordPress homepage?
Go to Settings → Reading in your WordPress dashboard, select A static page, then choose your landing page from the dropdown. Save and clear your cache. Your landing page will now load when visitors arrive at your domain.
The fastest way to build a landing page in WordPress is to use a dedicated landing page plugin. Tools like SeedProd let you design a distraction-free page in minutes without touching any code.
For giveaway setups, the section above on driving giveaway entries shows how to combine your landing page with RafflePress for even more results.
With the right template and a clear call to action, your WordPress landing page can start turning more visitors into leads and customers right away.
👉 Ready to build yours? You can start creating high-converting landing pages today with SeedProd and RafflePress.
You might also enjoy these related tutorials:
- Best Customer Acquisition Tools
- Best WordPress Email Capture Plugins
- How to Use Exit Popups to Grow Your Business
- How to Create a Link in Bio Page in WordPress
If you liked this article, please subscribe to our YouTube Channel for RafflePress video tutorials. You can also find us on Twitter and Facebook.

