New Update: Boost Social Proof with Reviews & Automation
New Update: Boost Social Proof with Reviews & Automation
 John Turner
 John Turner
Want to put your WordPress site into maintenance mode without confusing visitors or hurting your SEO?
WordPress maintenance mode lets you safely make changes behind the scenes while showing a clean, professional message to anyone who visits your site.
In this guide, I’ll show you exactly how to enable WordPress maintenance mode using a beginner-friendly plugin. You won’t need any coding skills or advanced setup.
You’ll also learn how to customize your maintenance page to collect leads, keep visitors informed, and make a great impression while your site is offline.
Quick steps to put WordPress in maintenance mode:
WordPress maintenance mode (also known as WP maintenance mode) is a state you can put your website in when making small changes in WordPress. When you enable maintenance mode, it essentially adds a landing page to your site, explaining why it’s unavailable and when it’ll be live again.
Some people get confused about the difference between maintenance mode and a coming soon page. To find out how they differ, see this guide on Coming Soon vs Maintenance Mode.
There are many reasons why you’d want to put your new website in maintenance mode.
You could be running an update for WordPress themes and plugins, changing your WordPress design, updating your core WordPress installation, or even fixing a security flaw.
Making changes to your website while it’s live can put users off and leave a negative impression. Some users might think that your site is broken and leave, while others could think it has been hacked and never return.
A common way to deal with this is to use your WordPress hosting or web hosting to create a staging website. This allows you to push the changes to your live website when you’re ready.
Moreover, putting WordPress in maintenance mode sends a signal to search engines and Google bots, telling them that your site is down. They can then resume indexing your site when maintenance is over.
If you’re not using a staging site, you’ll want to use maintenance mode. This will prevent any user-experience issues and allow you to show contact forms and other useful elements to help people stay in touch while your site is down.
Now that you know what maintenance mode is and when to use it on your WordPress site, how do you put WordPress in Maintenance mode?
The easiest way to add a maintenance page to WordPress is with a maintenance mode plugin. We’ll be using the SeedProd WordPress plugin for this tutorial, which isn’t just any wp maintenance mode plugin.

The SeedProd plugin is the best WordPress landing page builder with coming soon and maintenance mode functionality. With its drag-and-drop visual editor, stunning landing page templates, and powerful access controls, creating a maintenance page is super easy.
You can activate and deactivate maintenance mode with a single click. To keep your audience in touch with your brand during downtime, you can add subscription forms, social media buttons, countdown timers, and preview your changes on your website frontend.
We’ll explore all of these features as we guide you through setting up maintenance mode.
Let’s dive into the step-by-step guide.
First, click here to get started with SeedProd and download the plugin to your computer.
You’ll then need to install and activate the plugin on your WordPress website’s backend. If you need help, you can follow these instructions for installing a WordPress plugin.
Note: SeedProd has a free version; however, we’ll use the Pro version for the advanced features.
After activating the plugin, you’ll see a welcome message on your WordPress dashboard and a note asking you to enter your license key. You can find the license key either in your SeedProd account area or in the registered email address you used to buy the plugin.
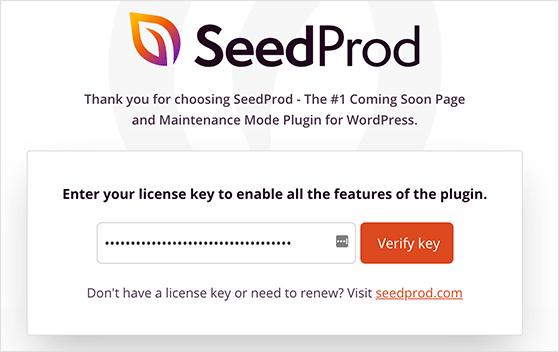
Enter your license key in the field provided and click Verify Key.
Next, scroll down the page and click the Create Your First Page button to view the landing page dashboard.

Along the top of the landing page dashboard are 3 different modes. Coming Soon Mode allows you to create a coming soon page, which is useful if you haven’t yet launched your website.
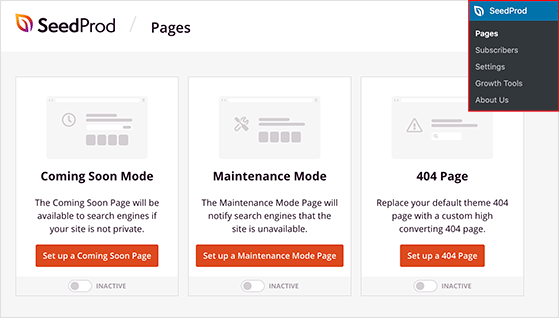
The 404 Page mode lets you show a custom 404 error page when users visit a broken link or missing page on your site.
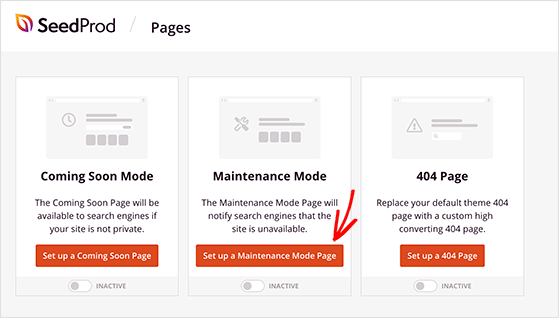
Yet, the option we’re interested in is Maintenance Mode. Under the Maintenance Mode heading, click the Set Up a Maintenance Mode Page button. This will take you to a screen where you can choose your maintenance mode template.
This plugin comes with a wide variety of stunning maintenance mode page templates. Each landing page template is designed to be mobile-friendly and easy to customize with the drag-and-drop page editor.
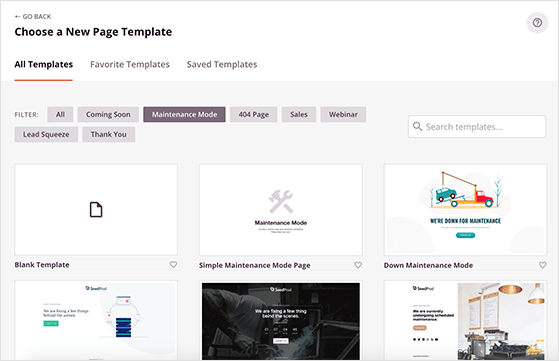
To choose a maintenance page template, hover your mouse over a template thumbnail and click the tick icon.
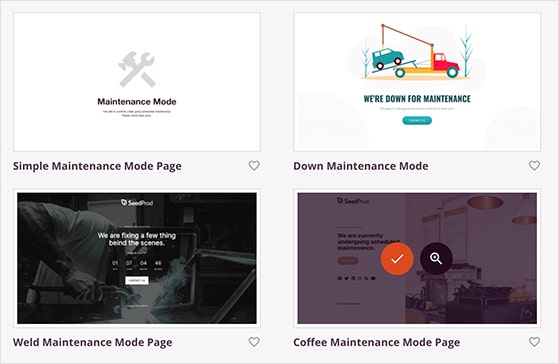
For our example, we’ll use the Coffee Maintenance Mode Page template.
After clicking the template, it will launch automatically in the visual page builder, where you can add your own content and customize it to suit your brand. Moreover, you won’t need to edit your function.php file or use code snippets to customize your page.
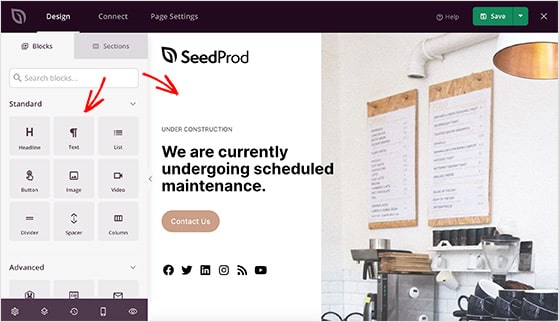
The drag-and-drop page builder has a simple, user-friendly interface. On the left-hand side are landing page blocks, and on the right is a preview of your maintenance mode page design.
You can drag any landing page block from the left-hand panel and drop it into place on the right and see the real-time changes.
The landing page blocks are split into 2 categories: Standard and Advanced.
Standard blocks include everything you need to design your page with images, videos, headlines, text, columns, spacers, and so on.
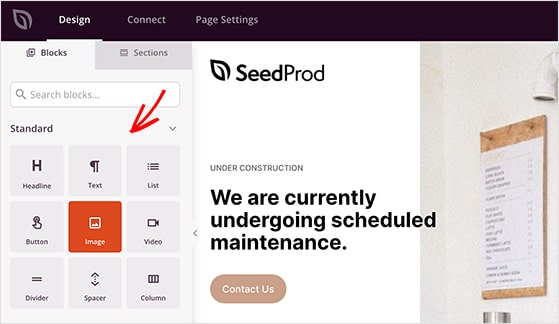
Yet, the Advanced blocks are more focused on helping you generate leads via your maintenance page.
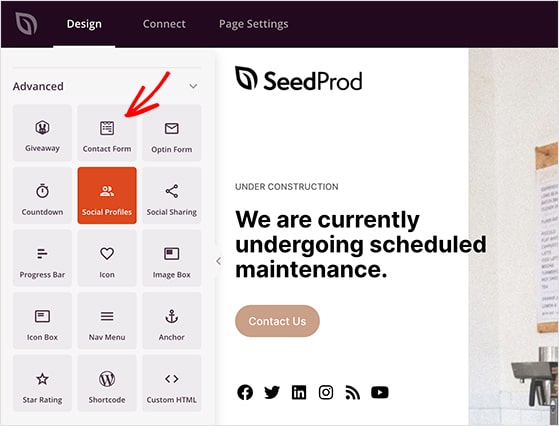
For instance, you can use the giveaway block to display a RafflePress giveaway and capture leads while your website is in maintenance.
You could also use the optin form block to allow users to sign up for notifications of when your site is live again, which is an excellent way to grow your email list.
Many of the landing page blocks also include pre-made block templates. These are ready-made block styles that you can implement with a single click.
To show you how this works, let’s add a countdown timer block to your maintenance page design.
Just drag and drop the block onto your live page preview. Clicking the block shows several content settings, such as the countdown type, end date and time, alignment, and more.
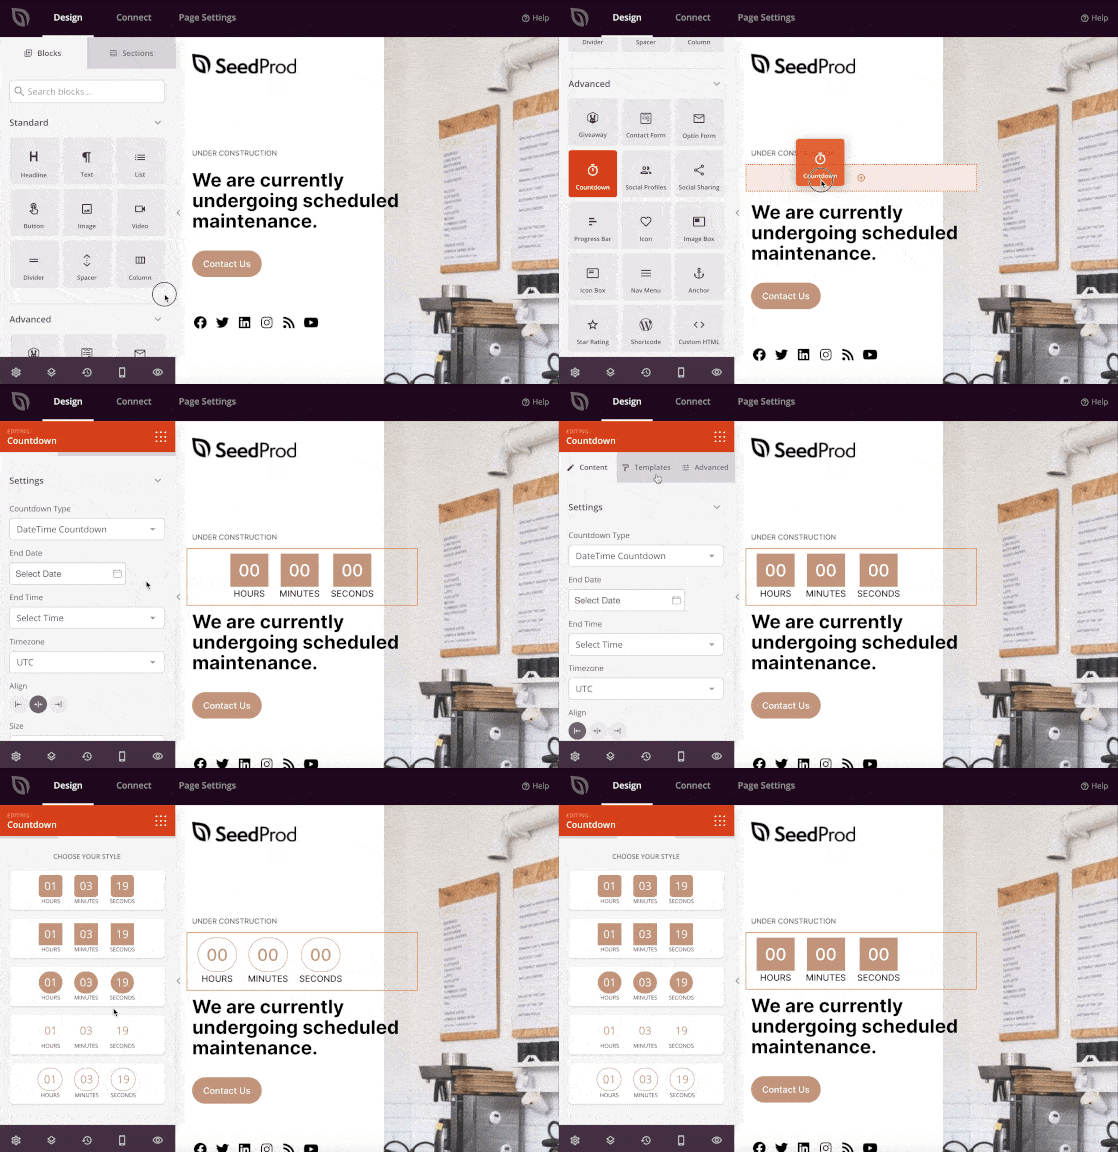
Then when you click the Templates tab, you’ll see 5 different countdown timer styles. To add the style to your block, just click the one you prefer.
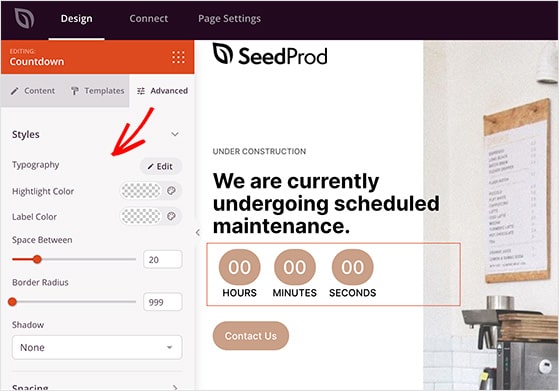
To change the block colors, spacing, and shadow, click the Advanced tab and adjust the styles.
If you have an eCommerce website or run an online store, you can use the built-in WooCommerce modules to add new functionality to your WooCommerce maintenance mode page.
This is an excellent way to help your WooCommerce store gain traffic and conversions while it’s under maintenance without extra WooCommerce plugins.
As well as blocks, SeedProd also includes handy landing page sections. These are pre-made page areas that you can add to your maintenance page without building them block by block.
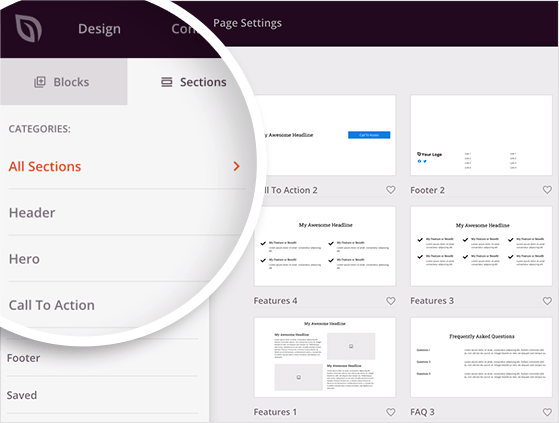
Just click the Sections tab to see the different areas, which include:
Click any section to add it to your page automatically.
In the example below, we used the FAQ section to answer any questions our audience may have about our maintenance process.
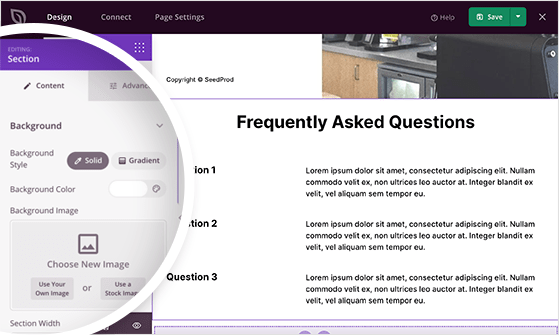
As you can see, it’s easy to change the content and style of different sections by adjusting the settings in the Content and Advanced tabs.
Keep adding content to your maintenance page until you’re happy with how everything looks.
To save your changes, click the green Save button in the top-right corner of your screen.
Customizing WordPress maintenance mode with SeedProd is just as easy.
The visual editor gives you complete control over the colors, fonts, and styling of your page. You can also set global color and image settings in the Global Settings panel.
To view the Global Settings, click the gear icon in the bottom-left corner of your screen.
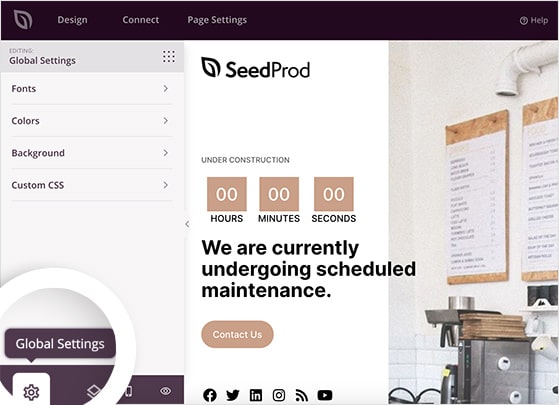
This panel has different sections where you can customize your global fonts, colors, backgrounds, custom CSS, and HTML.
In the Fonts section, you can choose from various Google fonts for your page headers and body text.
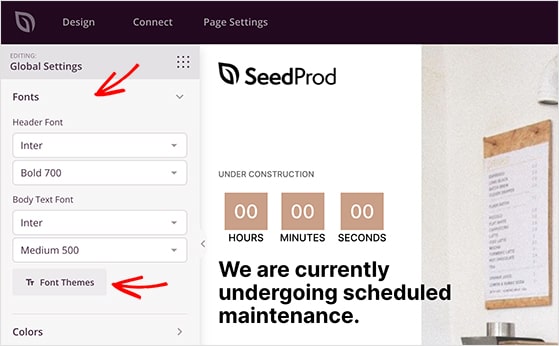
If you click the Font Themes button, you can see a curated list of font combinations, so you have an idea of which fonts look good together.
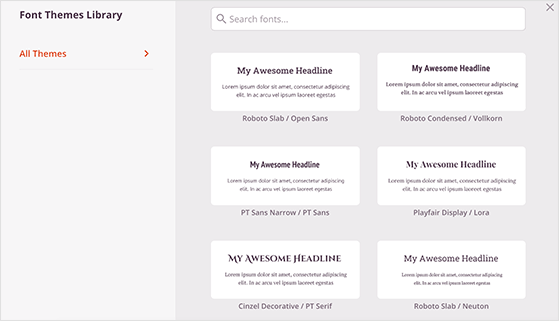
Just click the one you like to add it to your page automatically.
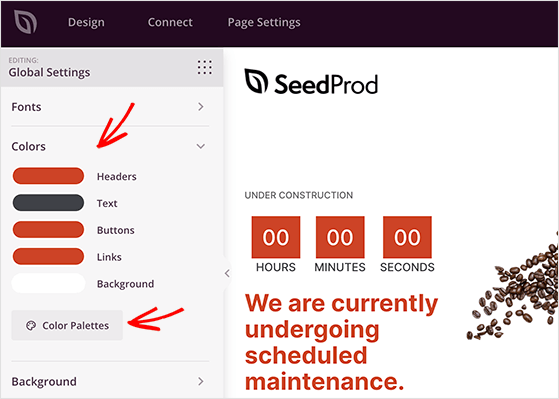
The Colors section is similar to the fonts. Here you can choose colors for your headers, text, buttons, and links.
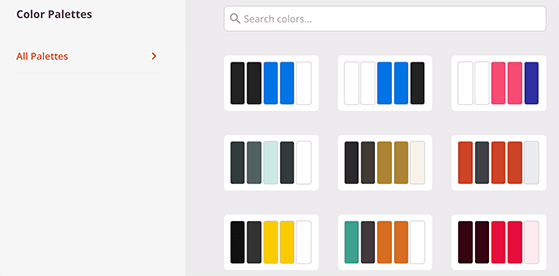
Alternatively, you can click the Color Palettes button to see over 20 professionally designed landing page color combinations.
If you’d like to change your WordPress maintenance mode background, click the Background section.
You can set global background colors and gradients here or upload a custom background image from your computer or WordPress media library.
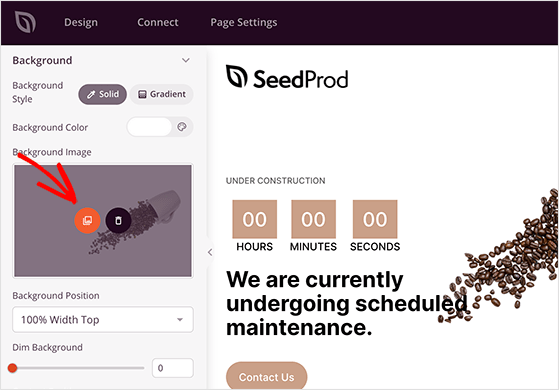
Hover your mouse over the existing background thumbnail and click the gallery icon to select and upload a custom image.
You can also upload a video background or full-width slideshow background by toggling the appropriate settings.
Remember to click the Save button when you’re happy with your maintenance page customizations.
When creating a maintenance page, it’s a smart idea to notify users when your website is back up. One of the best ways to do this is to add a subscription form where users can subscribe for notifications.
As well as reminding people that your site is live again, it’s a great way to boost your email subscribers.
Luckily SeedProd makes managing your subscribers easy by integrating with popular email marketing services. Click the Connect tab at the top of your screen to see a list of available providers.
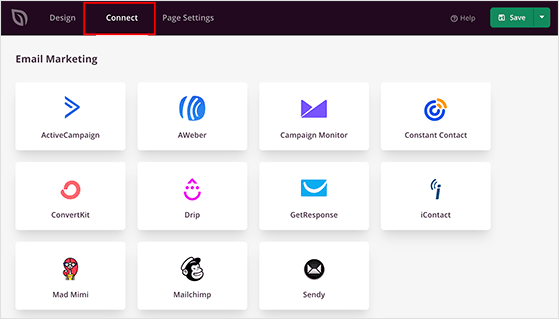
You can learn how to integrate with individual email services in the SeedProd integration documentation.
If you don’t have an account with an email provider, you can still manage your subscribers.
Anyone who signs up via your maintenance landing page has their details stored in SeedProd’s subscriber overview, which you can find by visiting SeedProd » Subscribers.
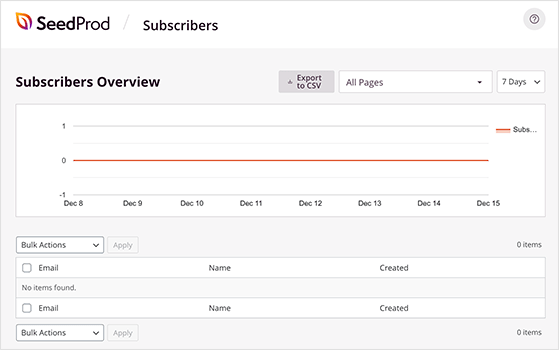
SeedProd also allows you to set up Google Analytics, enable Recaptcha, and connect to marketing automation tools via Zapier.
Now let’s look at your maintenance page settings. Click the Page Settings tab to see your General settings, Access Controls, SEO settings, and Scripts.
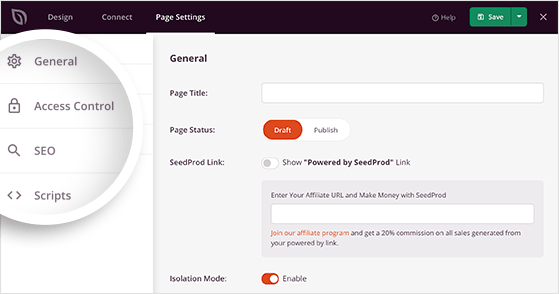
In the General settings, you can give your maintenance page a new page title, create a temporary redirect for specific URLs, and choose a new maintenance mode page template.
The Access Controls panel is where you can choose who will see your maintenance landing page and who will see your potentially broken website.
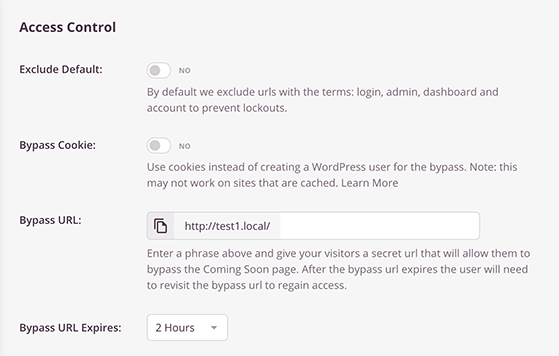
You can exclude URLs with login, admin, and dashboard from seeing your maintenance page by default. This prevents you and your administrators from getting locked out.
It’s also possible to use a Bypass Cookie so users with specific browser cookies can get past your maintenance page. However, this might not work if you use a cache plugin to cache your website.
Instead, you could create a Bypass URL giving visitors a secret URL that will allow them to avoid maintenance mode.
If you prefer, you can enter individual IP addresses to bypass maintenance mode, allow access by role, and even include and exclude specific pages from showing your maintenance screen.
Now that you’ve created your maintenance page, it’s time to make it live. But first, you’ll want to see if your page looks good on mobile devices.
To do this, click the Mobile Preview icon in the bottom left corner of your screen.
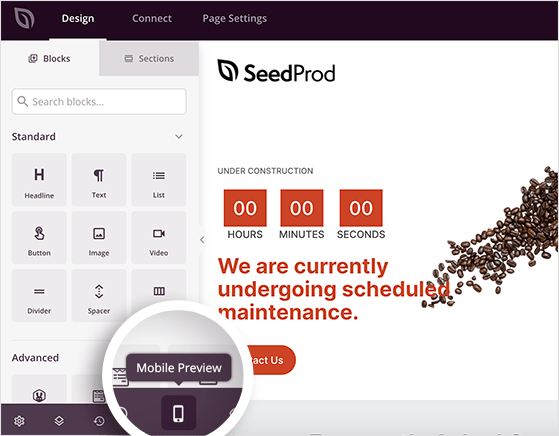
You can now see what your maintenance design looks like on mobile phones and tablets. If anything doesn’t look right, you can continue editing your page. Any changes you make are added to both versions of the page.
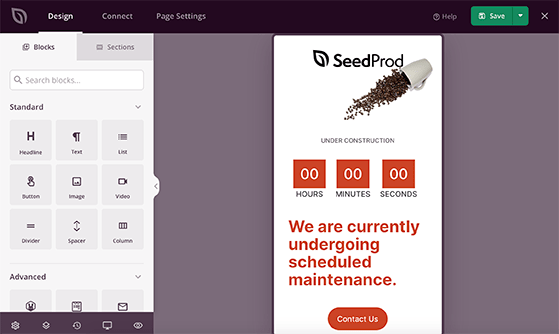
To switch back to the desktop, click the Desktop Preview icon.
Once you’re happy with how everything looks, click the down arrow next to the green Save button in the top-right corner of your screen and click Publish.
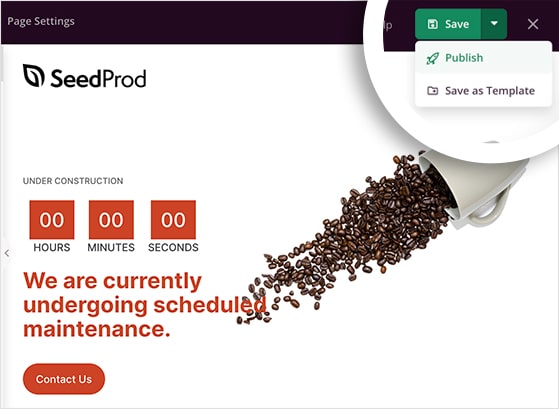
A lightbox popup will open, telling you that your page has been published.
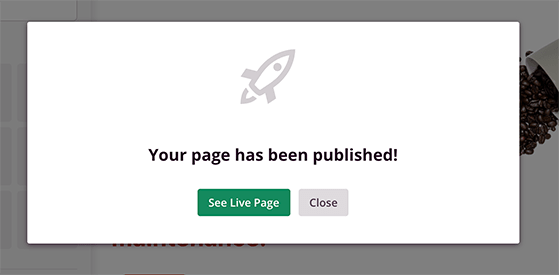
Go ahead and click the See Live Page button to see how it looks to visitors.
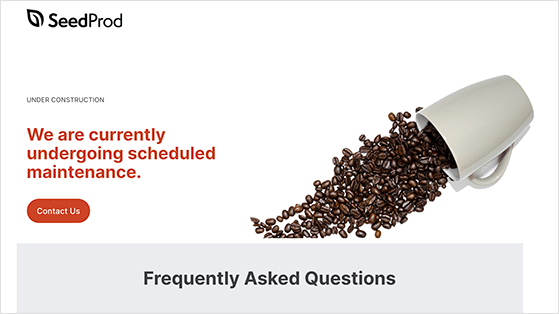
To enable maintenance mode and show the page to your website visitors, navigate to SeedProd » Pages from your WordPress admin area. Then click the toggle under Maintenance Mode from Inactive to Active.
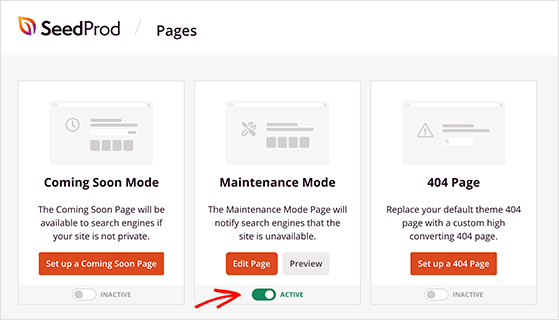
To turn off maintenance mode, just click the toggle again to make it Inactive.
And if you ever find yourself stuck in maintenance mode, here’s how to fix it.
We hope this article helped you learn how to put WordPress in maintenance mode. Now you can notify search engines that your website is temporarily unavailable and keep your website visitors up-to-date.
If you liked this article, you might also like this guide on adding a survey to your website.
Don’t forget to follow us on YouTube, Twitter, and Facebook for more great tips and tutorials.
Disclosure: Our content is reader-supported. This means if you click on some of our links, then we may earn a commission. We only recommend products that we believe will add value to our readers.
Copyright © 2024 SeedProd LLC. RafflePress® is a registered trademark of SeedProd LLC