New Update: Boost Social Proof with Reviews & Automation
New Update: Boost Social Proof with Reviews & Automation

 John Turner
 John Turner
Want to know how to add Google Analytics to WordPress?
Google Analytics is a free tool that shows who’s visiting your website, what they’re doing, and where they’re coming from. It helps you understand your audience and make better decisions to grow traffic, leads, and sales.
In this guide, I’ll show you how to add Google Analytics to your WordPress site step-by-step. I’ll also cover the easiest method I recommend for beginners, plus two other options if you prefer more control.
Google Analytics is a web-based analytics service that tracks and reports your website data in the Google Analytics dashboard. The service can measure many different website metrics, including:
With that information, you can discover patterns and trends that you can use to improve your small business marketing campaigns, your website traffic and keep your target audience on your site.
Google Analytics collects data from your visitors by adding a tag, commonly known as a tracking code, to each page on your site. That tag runs in visitors’ web browsers, collecting and sending information to one of Google’s data collection servers.
After collecting data from your website, Google Analytics generates customizable reports that help you visualize the tracking info, such as:
Inside the Google Analytics dashboard, you can save profiles for many websites and see default or custom metrics for each site.
As mentioned earlier, you need to add new tracking code snippets to each page of your website for Google Analytics to work. You should place the tracking code just before the closing </head> tag in your website theme header.
For many people, this isn’t easy because most WordPress website owners aren’t developers and don’t know how to work with HTML and JavaScript code.
But don’t worry.
We’ll show you several methods for adding Google Analytics to your WordPress website in this post. First, you’ll need to sign up for a Google Analytics account.
Google Analytics is free, and all you need is a Google or Gmail account to sign up. Signing up for Google Analytics is quite simple, so follow these instructions to create your account.
Step 1. First, go to the Google Analytics website and sign up for an account.
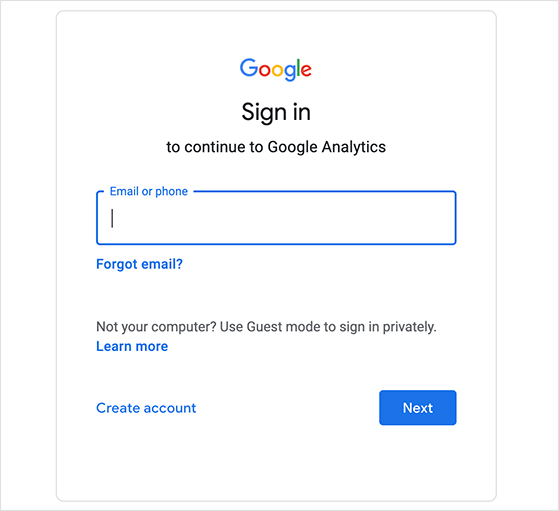
The page will ask you to log in with your Google Account, so you can use that to sign in if you have one. If you don’t already have a Google or Gmail account, you can create one from that page.
Step 2. After signing up for your Google Analytics account, you’ll see a screen prompting you to get started. Click the ‘Start Measuring’ button to enter the account setup process.

On the next settings page, you can enter an account name. Since this is an internal name, you can choose any name you like, then click Next to continue.
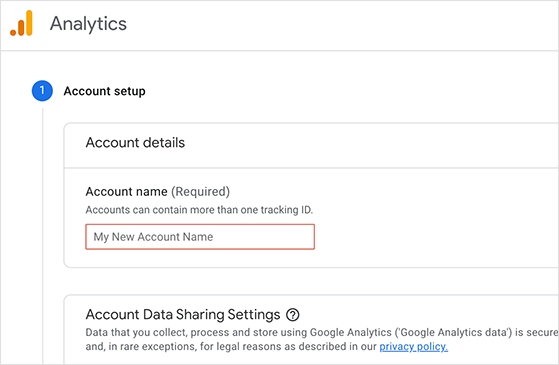
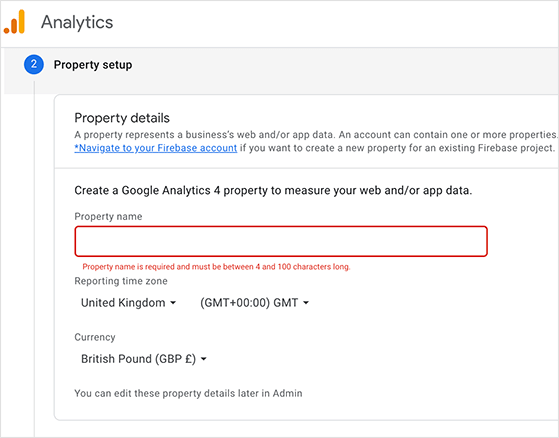
Now you can enter a property name for your Google Analytics account. This is typically the name of your website.
You can also choose the time zone and currency on the same page, then click Next.
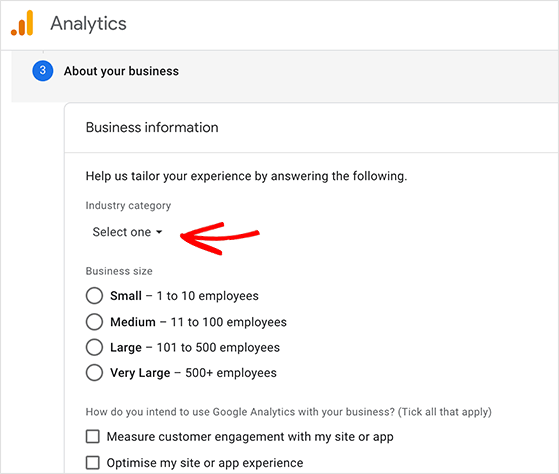
The next screen lets you tell Google about your business. You can choose your industry, business size, and how you intend to use Google Analytics 4 (GA4).
This information will help Google tailor your experience to your business needs.
Now click the Create button. Doing so displays the Google Analytics Terms of Service Agreement popup, so read through the agreement and click I Accept to continue.
Step 3. Now it’s time to create a data stream to collect your data. Since you want to set up Google Analytics in WordPress, choose the Web platform type.

Clicking the Web option opens a window to set up your stream. On this page, you can:
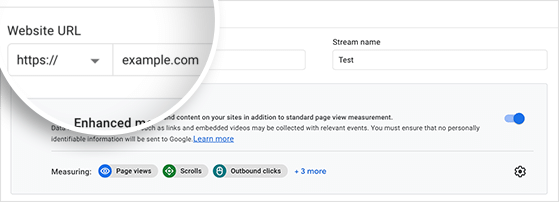
Click the Create Stream button to move on.
Now you will see a screen asking you to choose a method for adding the Universal Analytics tracking ID to your website.
You can add the tracking code to your site by using one of these options:
Because WordPress is a content management system, we will set up Google Analytics in WordPress using the Global site tag option.
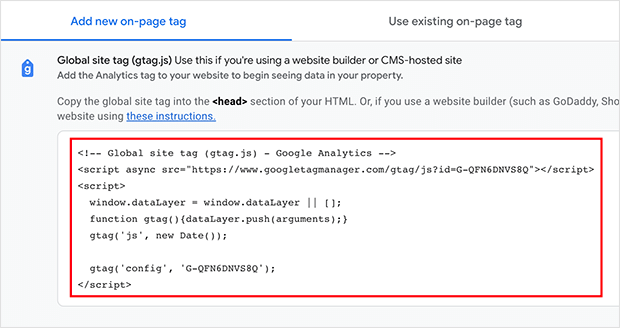
Leave the browser window open for now so you can switch back and copy the code when you need it. From there, you can follow one of the methods below to add Google Analytics to WordPress.
There are several methods you can use to install Google Analytics in WordPress. We’ll share 3 methods in order of difficulty.
The first method is the easiest way to set up Google Analytics, and you should only use the last method if you’re a confident and advanced WordPress user. So pick the method that works best for you.
Note: You need to use only one of these methods on your website to avoid double-tracking page views in your Google Analytics account.
| Method: MonsterInsights Plugin |
| Best For: Beginners who want to set up Google Analytics in minutes |
| Difficulty: Easy |
| Lets You View Stats in WordPress? ✅ Yes |
| Works with GA4? ✅ Yes |
We’ll use MonsterInsights to install Google Analytics in WordPress for the first method.

MonsterInsights is the most popular Google Analytics plugin for WordPress, with over 3 million websites using it, including PlayStation, Bloomberg, Zillow, and more. It’s the easiest way to add Google Analytics to WordPress for beginners and advanced users.
Check out our MonsterInsights review for more information.
MonsterInsights offers a paid premium plugin with various pricing options and a free version that anyone can use. For this guide, we’ll use the Pro version of MonsterInsights for advanced features like eCommerce tracking, ads tracking, author tracking, and more.
Let’s get started.
First, install and activate the MonsterInsights plugin on your WordPress website. For details on how to do that, you can follow this guide on how to install a WordPress plugin.
After installing the plugin, go to Insights » Settings from your WordPress dashboard admin and enter your MonsterInsights license key. You can find your license details by logging in to the MonsterInsights website.
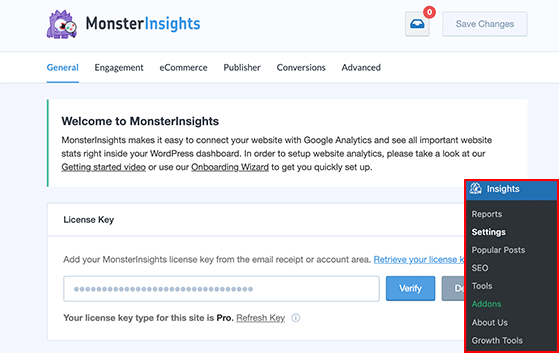
Click the Verify button to move on.
Next, click the Insights menu item again and click the Launch Setup Wizard button. This will help you connect Google Analytics and MonsterInsights quickly and easily.
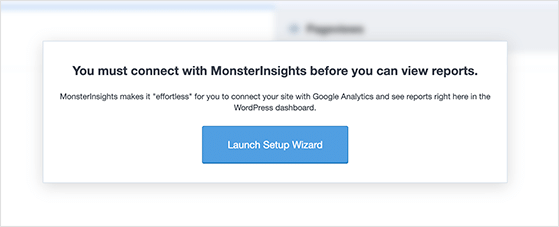
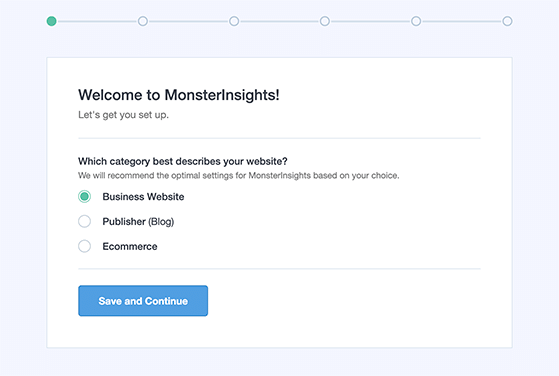
On the first screen, choose whether your website is a Business Website, Publisher, or Ecommerce Site. Then you can click Save and Continue.
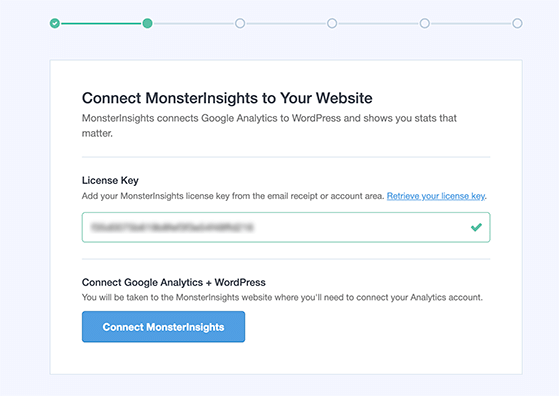
Next, you can enter your MonsterInsights license key if you haven’t already. So click the Connect MonsterInsights button.
The next screen asks you to choose a Google Account to sign into MonsterInsights. It’s best to select the account you used to set up Google Analytics.

After, MonsterInsights will ask for permission to access your Google Analytics account. So click the Allow button to continue.
The last step is to select the profile you want to track. You need to select your website here and click on the Complete Connection button to continue.
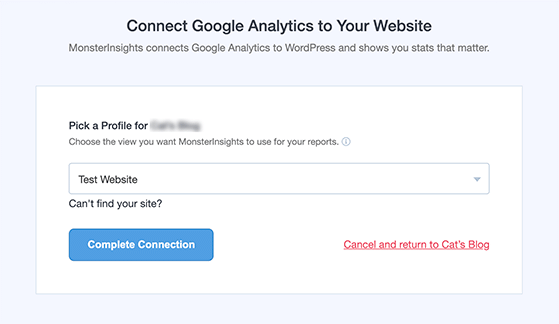
MonsterInsights will now install Google Analytics on your WordPress website. After, you can choose the recommended settings for your site.
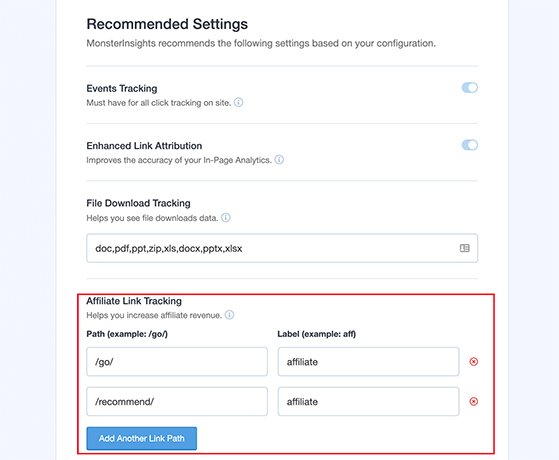
The default MonsterInsights settings should work for most websites. However, if you use an affiliate link plugin, you’ll need to add the path you use to cloak your links. Doing that will allow you to track affiliate links in Google Analytics.
From there, click the Save and Continue button.
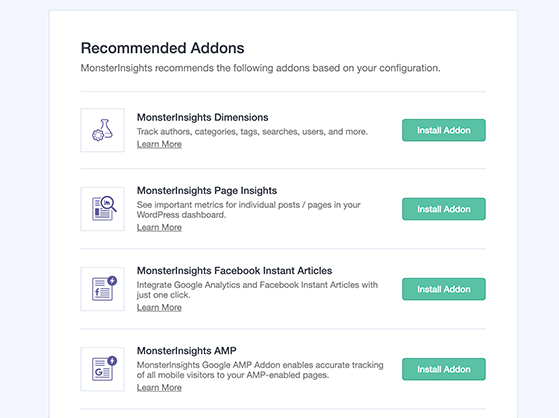
Next, MonsterInsights will suggest several add-ons that come with your plan or that you can upgrade to access. If you don’t want to install any addons, simply click the Save and Continue button.
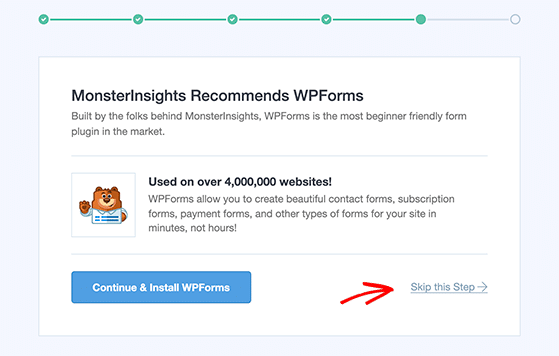
After, the plugin asks you to install WPForms, the best WordPress contact form plugin. You can click the Continue and Install WPForms button or click the Skip this Step link to continue.
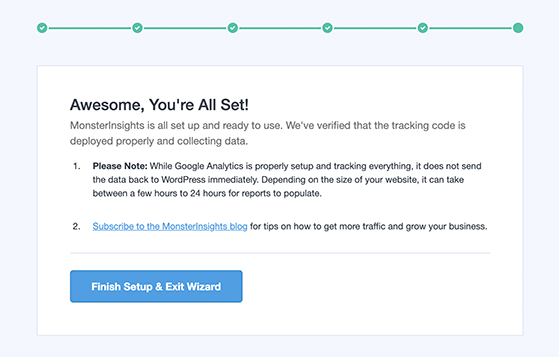
That’s it! You have now set up Google Analytics on your WordPress site. Click the Finish Setup & Exit Wizard button to head back to your WordPress dashboard.
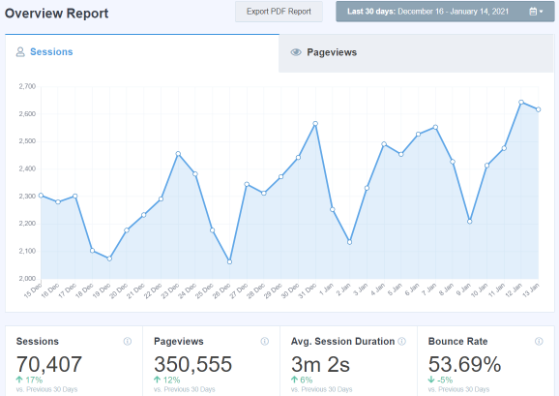
Google Analytics will take some time to start showing your website statistics. But when your stats are ready, you can view your analytics reports right inside your WordPress dashboard with MonsterInsights.
Simply visit the Insights » Reports page to check out a quick overview of your analytics data. It also comes with several add-ons to view other data.
For instance, you can use the popular posts addon to show your top-performing content and automatically add inline popular posts links to boost engagement.
Alternatively, you can use the eCommerce addon to check your product stats and automatically add your top-performing products to the end of blog posts to boost sales.
Key Takeaway: MonsterInsights is the easiest and most beginner-friendly way to add Google Analytics to WordPress. You can set it up in minutes and view your stats right inside your dashboard.
| Method: WPCode Plugin (Insert Headers and Footers) |
| Best For: Users who want a simple way to paste the tracking code |
| Difficulty: Moderate |
| Lets You View Stats in WordPress? ❌ No |
| Works with GA4? ✅ Yes |
The following method for adding Google Analytics to WordPress isn’t as good as using the MonsterInsights Google Analytics WordPress plugin. That is because it doesn’t allow you to set up advanced tracking. This method also doesn’t let you view your Google Analytics data inside WordPress.
First, open the browser window that has your Google Analytics tracking code and copy it to your clipboard. This is from step 3 of creating your Google Analytics account.

Next, go to your WordPress dashboard and install the WPCode plugin. This plugin allows you to quickly add code to your WordPress site without directly editing WordPress theme files.
After activating the plugin, go to the Code Snippets » Header & Footer page.
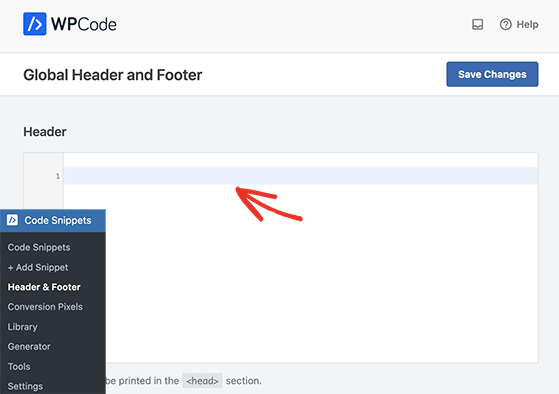
Now, paste the Google Analytics tracking code from earlier into the ‘Header’ section. Remember to click the Save Changes button to store your settings.
That’s it! You have now installed Google Analytics on your WordPress site.
Key Takeaway: WPCode offers a fast and simple way to add your Google Analytics tracking code to WordPress without editing theme files. But it doesn’t give you any in-dashboard reports.
| Method: Manually Add Tracking Code to Theme Files |
| Best For: Advanced users comfortable editing PHP files |
| Difficulty: Hard |
| Lets You View Stats in WordPress? ❌ No |
| Works with GA4? ✅ Yes (with correct placement) |
The final method is for advanced WordPress users familiar with editing code. This solution is often unreliable because the code you add will disappear if you change your WordPress theme.
While we rarely recommend this method, you should ensure you have a WordPress child theme active on your website. A child theme prevents your tracking code from disappearing if you update your parent theme.
So when you carry out this method, ensure any theme files that you edit are from your child theme.
There are 2 ways to add your Google Analytics tracking code to your WordPress theme.
1. Add Google Analytics code in header.php file
Go to your theme editor or file editor and open the header.php file for this approach. From there, paste the Google Analytics tracking code from earlier, right after the <body> tag.
Remember to save the file and upload it back to your server.
2. Add Google Analytics code to your theme’s functions.php file
For this method, open your WordPress theme’s functions.php file and enter the following code:
<?php
add_action('wp_head', 'rp_add_googleanalytics');
function rp_add_googleanalytics() { ?>

// Paste your Google Analytics tracking code here

<?php } ?>
Now paste your tracking code after the line telling you to ‘paste your Google Analytics tracking code here.’
You can now click ‘update file’ and re-upload it back to your server.
Key Takeaway: Editing your theme files to add Google Analytics gives you full control, but it’s easy to break something if you’re not experienced. Use this method only if you’re confident editing code.
Google Analytics can show you a wealth of data that it collects from your website. You can view all of that data by going to your Google Analytics dashboard.
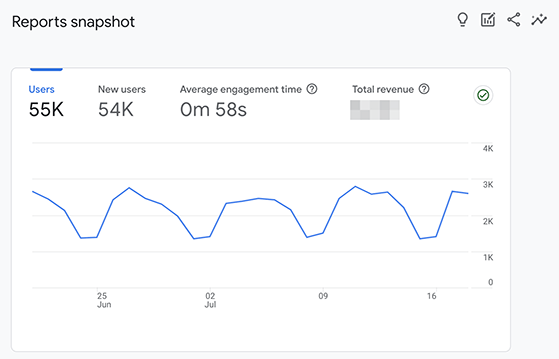
You will see ready-made analytics reports in the left-hand panel in your analytics dashboard. Each section has different tabs that you can expand to see more options, including:
With this information, you can make data-driven decisions on optimizing your website for more traffic, engagement, leads, and conversions.
Google Analytics can be a bit overwhelming with all its reports. If you’re looking for a simpler way to see the most important information about your website, especially if you’re using Google Analytics 4, check out OnePageGA.
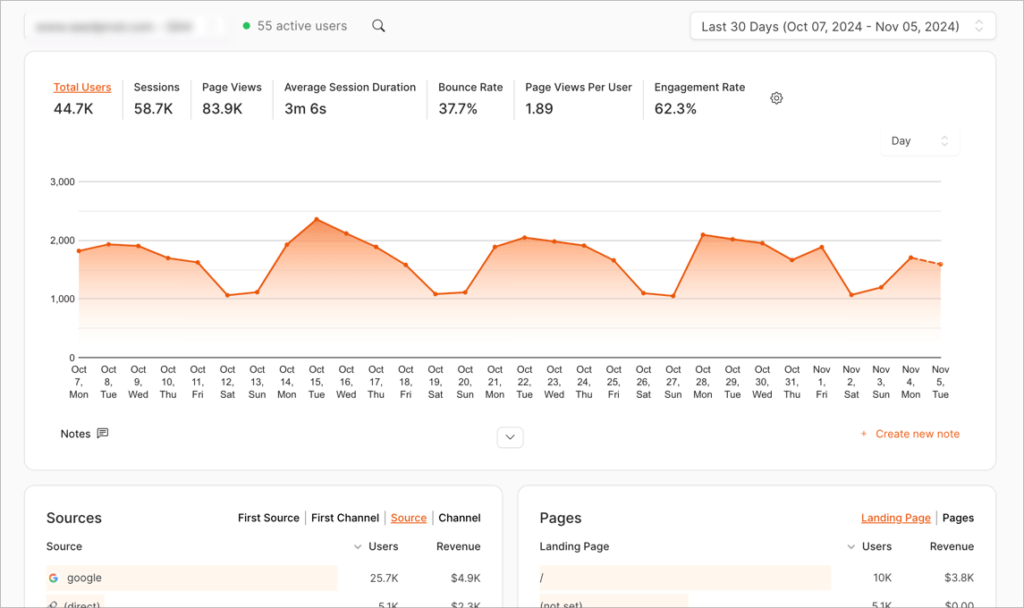
It shows you things like how many people are visiting your site, which pages they’re looking at, where they’re coming from, and if they’re doing what you want them to do (like signing up for your email list or buying something), all on one simple page.
Even better, it works with any website, not just WordPress.
Get started with a 14-day free trial of OnePageGA.
Q: What is the easiest way to add Google Analytics to WordPress?
The easiest way is by using the MonsterInsights plugin. It sets everything up for you and shows your stats inside the WordPress dashboard.
Q: Can I add Google Analytics to WordPress without a plugin?
Yes. You can use a tool like WPCode to paste your tracking code into your site’s header, or manually add it to your theme files.
Q: Does Google Analytics work with any WordPress theme?
Yes. As long as the tracking code is added correctly, Google Analytics works with any WordPress theme.
Q: How long does it take for Google Analytics to start tracking?
Usually within a few hours. You can log in to your Google Analytics account to check for real-time data.
Q: Can I use Google Analytics with WooCommerce?
Yes. You can use MonsterInsights’ eCommerce addon or manually set up GA4 events to track your WooCommerce store activity.
There you have it.
We hope this article helped you learn how to add Google Analytics to WordPress. If you have an online store, you can follow this guide to add Google Analytics to WooCommerce. You can also check out our All in One SEO review for help improving your website’s rankings.
If you liked this article, please subscribe to our YouTube Channel for RafflePress video tutorials. You can also find us on Twitter and Facebook.
Disclosure: Our content is reader-supported. This means if you click on some of our links, then we may earn a commission. We only recommend products that we believe will add value to our readers.
Copyright © 2024 SeedProd LLC. RafflePress® is a registered trademark of SeedProd LLC