How to Create a Live Sales Notification in WordPress
 John Turner
 John Turner
Want to add a live sales notification to WordPress? I’ve used them on client sites to boost conversions, build trust, and create real-time urgency, and they truly work.
In this guide, I’ll walk you through how to set up live sales notifications in WordPress using a tool called TrustPulse. You’ll see why they’re so effective, how they tap into FOMO to increase sales, and how to customize them for your store without needing any code.
Quick steps to setup live sales notifications:
- Step 1: Create a TrustPulse Account
- Step 2: Connect TrustPulse to Your WordPress Site
- Step 3: Choose a Campaign Type (Recent Activity)
- Step 4: Customize Your Sales Notification Design
- Step 5: Enable Activity Tracking on Your Website
- Step 6: Set Display Rules for Notifications
- Step 7: Publish Your Live Sales Notification in WordPress
Why Add Live Sales Notifications to WordPress
A sales notification is a small popup on your website’s front end that appears whenever shoppers purchase a product or service. Using a recent sales popup is a great way to improve your business credibility and persuade potential customers to go through with their purchase.
Notification popups use the fear of missing out (FOMO) to encourage users to take action.
When users browse your website or WooCommerce store and see other people making a purchase, it immediately improves how they see your brand. They’re then left wondering what benefits those buyers get from buying those selected products and how they could be missing out.
As a marketing tool, FOMO is super-effective. Just check out these FOMO statistics to learn why:
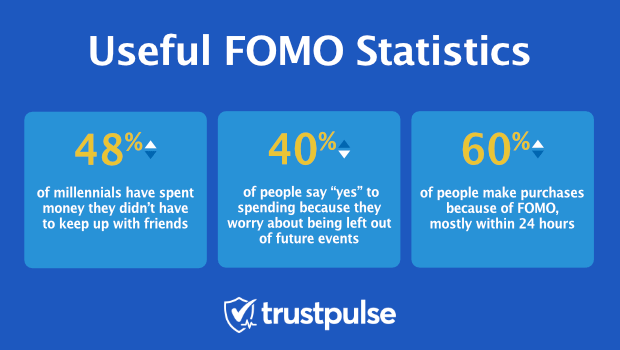
Even better, custom notifications boost sales on eCommerce websites by up to 15%.
Now that you know why sales notifications are an excellent tool for driving more leads and sales let’s look at how to create them on your WordPress or WooCommerce site.
How to Create Live Sales Notifications with TrustPulse
The easiest way to create a sales notification message in WordPress is with TrustPulse. TrustPulse makes it easy to leverage the power of social proof with recent sales notification popups.

With real-time event tracking, you can show a live sales feed of any action on your website, including:
- Recent orders
- Newsletter subscriptions
- Webinar registrations
- Virtual orders
- Limited stock products
- Giveaway entries
Plus, TrustPulse’s On-Fire notifications can show how many people have taken action in a given time.
The app is easy to use, includes flexible design options, and provides detailed analytics to see which of your website or online store pages perform best.
Best of all, TrustPulse works with any website, including WordPress, Shopify, and more. It also offers integrations for page builders like Elementor, SeedProd, and popular WooCommerce plugins.
Bottom line: TrustPulse is an excellent choice as a WooCommerce live sales notification plugin.
So if you want to create a live sales notification in WordPress, here’s how to do it with TrustPulse.
Step 1: Create a TrustPulse Account
TrustPulse is a live sales notification tool and a WordPress popup plugin. It has a free version and a paid plan and works with the most popular WordPress plugins.
For this tutorial, we’ll use the paid version of TrustPulse. However, the steps to add order notifications to your WordPress website are pretty much the same.
So, click here to get started with TrustPusle, then click the Get TrustPulse Now button.

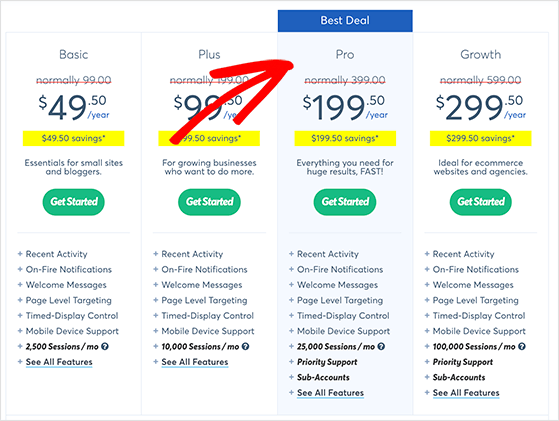
You can choose a TrustPulse plan that best suits your business needs on the product page.
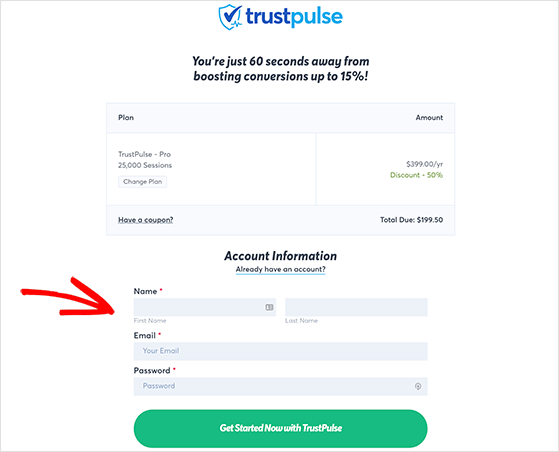
Afterward, you can fill out your account details and click the Get Started Now with TrustPulse button.
Now enter your payment information and click the Pay button.
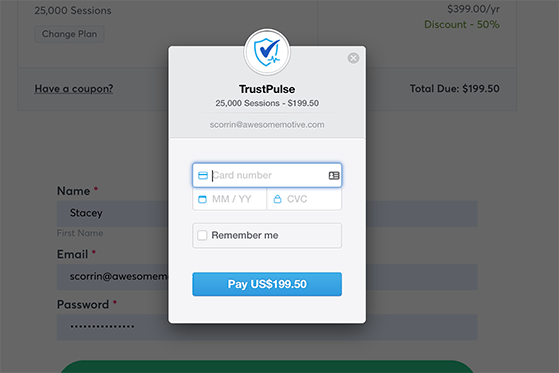
Great work! You’ve signed up for TrustPulse successfully. Now it’s time to create a live sales notification in WordPress.
Step 2: Connect TrustPulse to Your WordPress Site
After signing up for TrustPulse, it will ask you to enter your website’s name and domain name. You can use any name you like, but you’ll need to use your actual URL for the domain name.

When you’ve filled in your website details, click the Save Site button.
Step 3: Choose a Campaign Type (Recent Activity)
On the next page, TrustPulse will tell you that you haven’t created any campaigns yet. To create a new campaign, click on the green Create Campaign button in the top-right corner.

This will take you to the campaign creation page, which has several templates. In the first section, you can give your new campaign a name. You can call it whatever you like, but we’d suggest choosing a name relevant to what you need it for, such as “coupon notifications” or “checkout page notifications.”
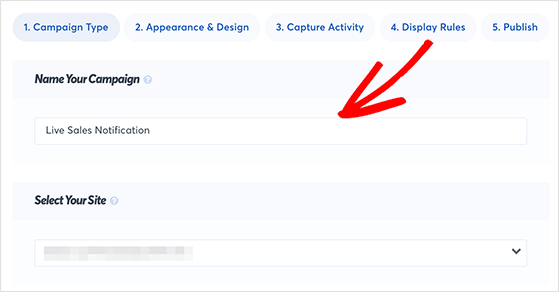
Next, scroll down the page to select your campaign type. To show notifications, you’ll need to ensure that the Recent Activity campaign type is selected.
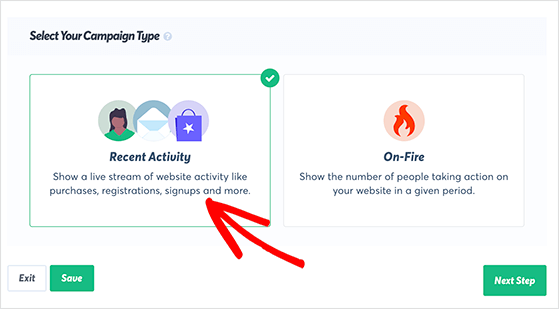
You can then go ahead and click the Next Step button.
Step 4: Customize Your Sales Notification Design
TrustPulse offers a variety of customization options to change your notifications look. The app will also show a live preview of your notification popup as you make changes.
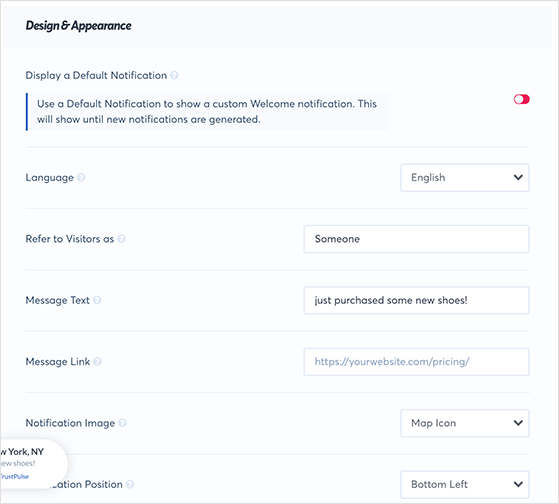
It’s easy to adjust the following settings with just a few clicks:
- Your notification popup language
- The customer name or how you’ll address them
- Your notification message
- Where you’ll redirect users after clicking
- The notification image, such as a map, icon, product image, etc.
- Where you’ll display the notification on your website.
- The notification size
- Animation options
- Default notification settings
It’s also possible to show the Advanced Settings section to change your popup’s background color, text color, drop shadow, border, CSS, and more. This makes it easy to match your live sales notification to your website’s branding.
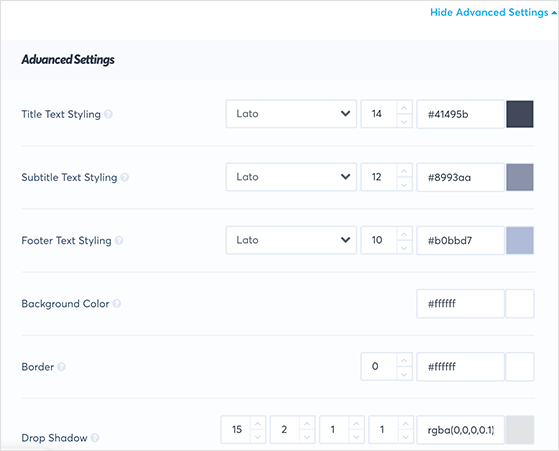
When you’re happy with your customizations, click the Next Step button.
Step 5: Enable Activity Tracking on Your Website
To display your notifications correctly, you need to let TrustPulse capture your website activity so that it can show it to visitors.
On the next page, you can select 2 different configurations for TrustPulse to capture activity on your website, which includes:
- AutoMagic: Track and record user activity and submissions automatically.
- Zapier: Connect to a separate tool to capture visitor activity from over 2,000 web apps.
For this tutorial, we’ll use the AutoMagic option because it’s easy to use for beginners, so go ahead and select that option.
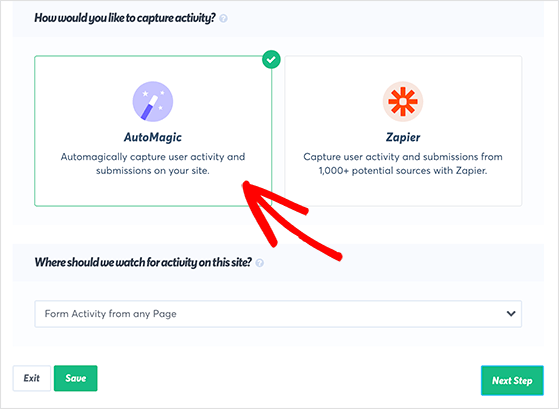
After, choose which activity you want TrustPulse to track by clicking the dropdown menu.
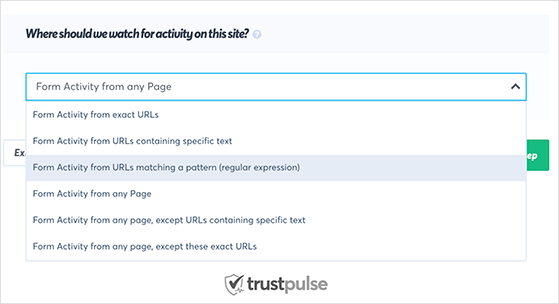
You can track activity from:
- Any page on your website
- Exact URLs
- URLs matching a regular expression
- Any page except URLs with specific text
- Any page except exact URLs
These options provide plenty of flexibility. You could pick the Exact URLs option to show activity on your checkout page, giveaway landing page, and upsells. Or you can keep things simple and choose the Any Page option.
After selecting your preferred option, click the Next Step button.
Step 6: Set Display Rules for Notifications
On the next page, you can set rules which dictate when your notifications show on your website.
First, choose where you want to display your notifications from the dropdown menu.
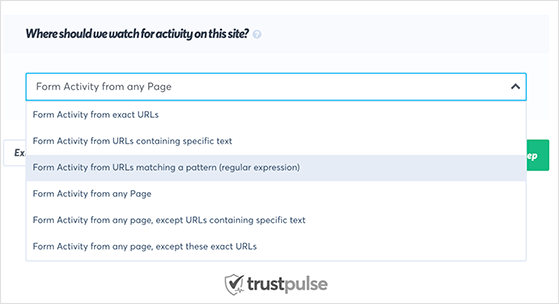
You can display your live sales notifications on:
- Any page on your website
- Exact URLs
- URLs matching a regular expression
- Any page except URLs with specific text
- Any page except exact URLs
After, you can adjust the notification settings, which include:
- The delay before showing the first notification (in seconds)
- The length of time a notification shows
- The delay time between notifications
- If you’d like to show notifications on mobile devices
- If you want the notifications to loop through again if visitors have seen them all
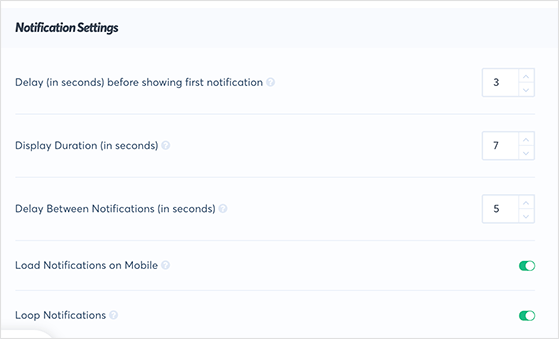
The default settings are a great place to start, or you can choose your own. When you’re happy with your changes, click Next Step.
Step 7: Publish Your Live Sales Notification in WordPress
The final step is to publish your sales notifications in WordPress.
There are 2 ways you can do this: manually adding the TrustPulse embed shortcode to your website or using the TrustPulse live sales notification plugin.
The easiest option is to use the TrustPulse plugin. To do this, navigate to Plugins » Add New from your WordPress admin area and type TrustPulse into the search box.
Then click Install Now to install it instantly.
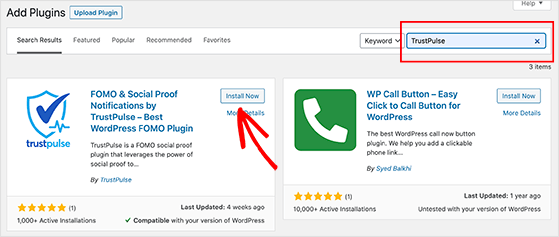
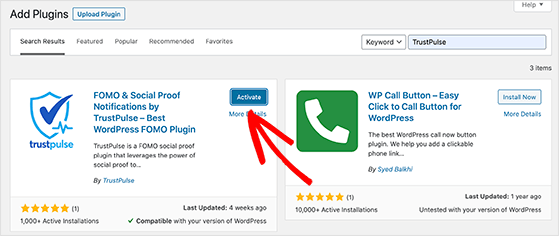
After, click the Activate button to activate TrustPulse on your website.
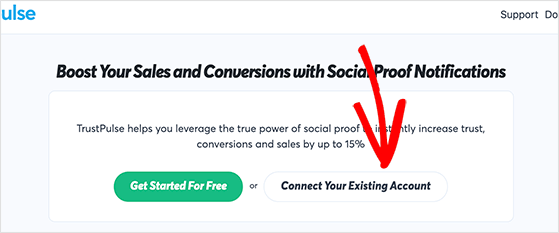
This will take you to the TrustPulse dashboard, where you can either sign up for an account or connect your existing account. Since we’ve already created an account with TrustPulse, click the Connect Your Existing Account button.
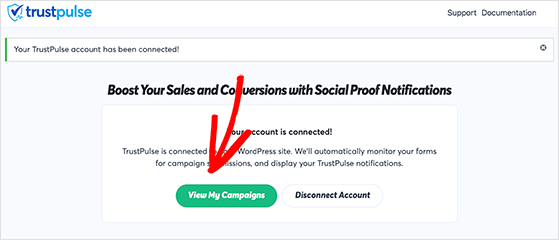
TrustPulse will automatically detect your settings and give you the option to view your campaigns. Clicking the View My Campaigns button shows you the campaign we created earlier.
So go ahead and edit this campaign and click the Publish tab. You should now see a message saying that your campaign is now active.
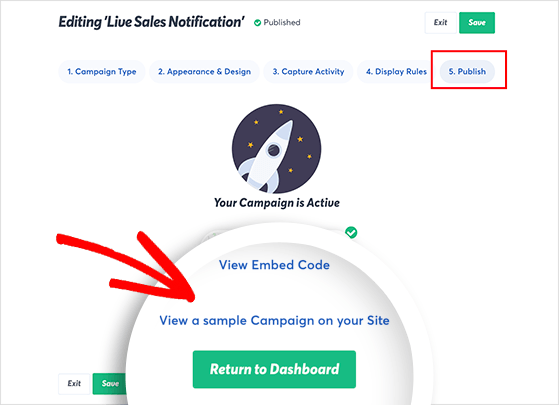
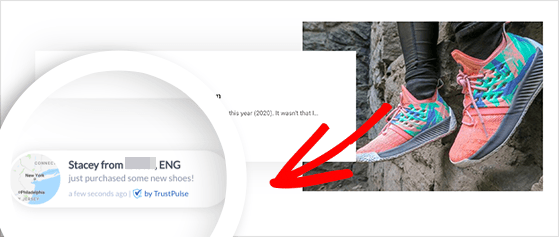
To see a preview of how your notifications look on your website, click the View a Sample Campaign link.
Remember to click Save to preserve all your settings.
FAQ About Live Sales Notifications in WordPress
That’s it. Now you know how to add live sales notifications in WordPress. If you’re running an online store or promoting digital products, these popups can help you build trust and turn more visitors into buyers.
TrustPulse makes the whole process simple. You can show real-time activity, customize every part of the popup, and track what’s working without needing any code.
Looking for more ways to boost engagement? Here are a few helpful guides to check out:
- How to Increase Online Sales Through Social Media
- Do Giveaways Increase Sales?
- How to Make a WooCommerce Contest
If you liked this article, please subscribe to our YouTube Channel for RafflePress video tutorials. You can also find us on Twitter and Facebook.
