New Update: Boost Social Proof with Reviews & Automation
New Update: Boost Social Proof with Reviews & Automation

 John Turner
 John Turner
Want to learn how to create a poll in WordPress?
I’ve added polls to everything from giveaway landing pages to blog sidebars, and they’ve always helped me connect better with my audience. Whether you’re collecting opinions, running a vote, or boosting engagement, adding a poll is one of the simplest ways to make your site more interactive.
In this tutorial, I’ll show you step-by-step how to create a poll in WordPress.
Polls get your website visitors involved with your WordPress site. People who answer questions and share their thoughts feel more connected to you.
But engagement isn’t the only benefit. Polls also give you valuable information about what your visitors are interested in.
You can use this information to improve user experience, design better products, and make smart decisions about your WordPress website.
If you’re a WordPress blogger, polls are a great way to keep your readers involved. They help you collect feedback and even bring more people to your site.
But with so many different tools, how do you decide which one to use?
Here are some things to keep in mind when choosing a WordPress poll plugin:
Think about these things so you can find the perfect poll maker for your WordPress website. It will help you connect with your audience and improve your content.
Now, let’s look at how to create that new poll. I’ve picked 3 tools with the features I mentioned above and which I’ve used regularly on my personal WordPress websites.
Takeaway: RafflePress is perfect if you want to boost poll responses by offering prizes. You can run a poll as part of a giveaway to drive traffic, get feedback, and grow your email list at the same time.
For the first method, I’m using RafflePress, one of the best WordPress giveaway plugins. With its drag-and-drop builder, you can grow your email list, social media followers, and website traffic with viral giveaway contests.

One of my favorite RafflePress features is its polls and survey action, which let users enter by completing a poll.
Did you know that most people answer surveys without really caring about the answers? Research shows that 60% of people answer questions indifferently or randomly without incentives.
RafflePress solves this by adding prizes. When people have the chance to win something, they’re more likely to answer your polls thoughtfully.
So, running a giveaway with a poll is a win-win. You get high-quality feedback, and your audience gets the chance to win a prize.
With that in mind, here’s how to create a poll in WordPress with RafflePress:
First, install and activate RafflePress on your WordPress website.
If you need help with this, see our guide on how to install RafflePress.
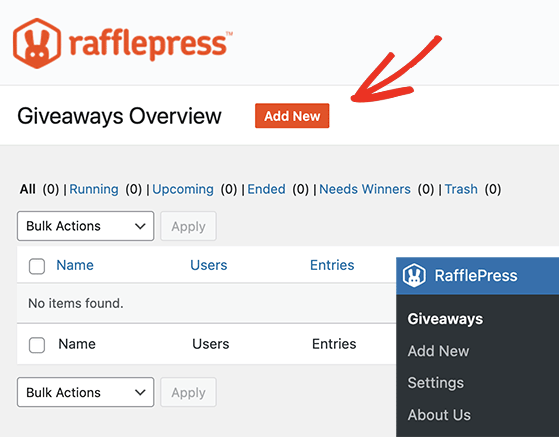
Then, navigate to RafflePress » Add New from your WordPress dashboard to start setting up a new giveaway.
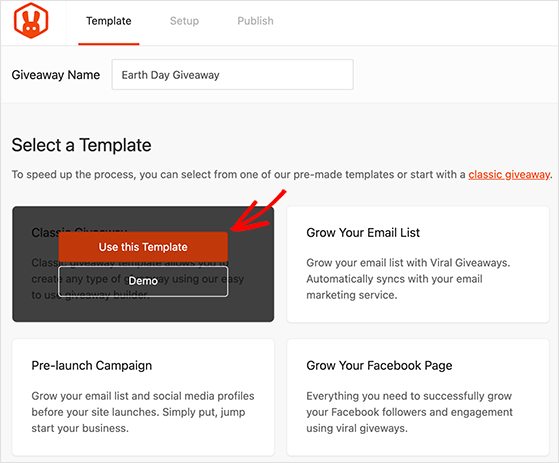
Provide a name for your giveaway and select a relevant giveaway template, or choose a blank template to start from scratch.
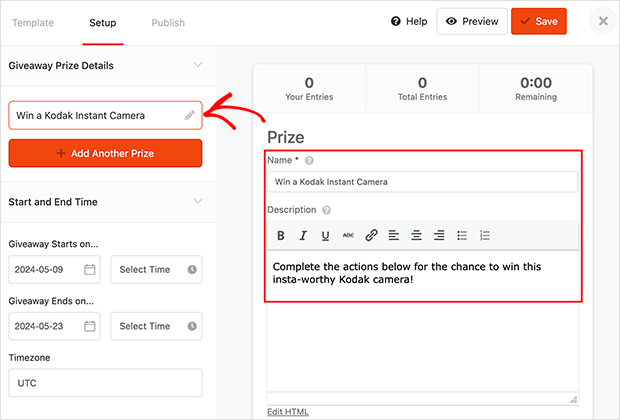
Next, add your prize information to encourage participation and combat survey abandonment.
Click the pencil icon to add your prize name and description.
You can then click the “Select Image” button to upload a photo of your prize or an eye-catching image.
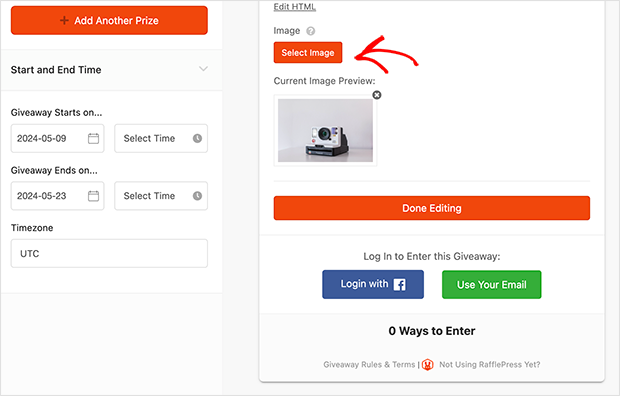
On the left-hand side, you’ll see options to set the start and end times and dates.
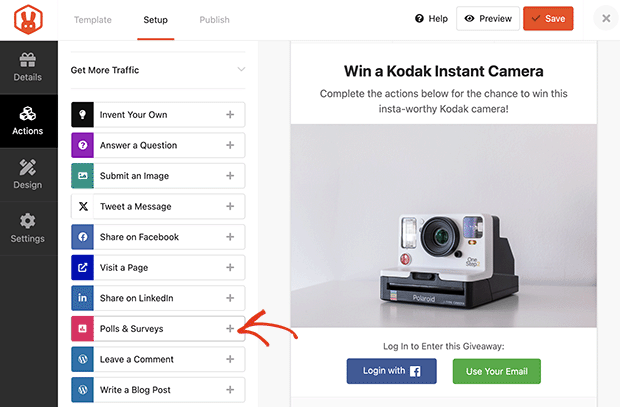
Next, click the “Actions” tab in the left sidebar. Here, you’ll find tasks users can complete to enter your giveaway.
For users to complete a poll, click the plus icon next to the “Polls and Surveys” action. This will add it to your giveaway widget on the right.
After adding the “Polls and Surveys” action, you can add your poll questions in the action settings panel.
You can choose between an open question or multiple choice in the dropdown menu. Then, type in your question and add the potential answer choices.
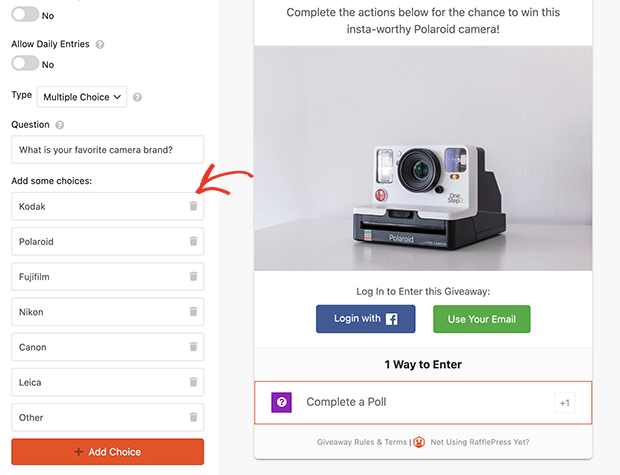
Once your poll is in place, you can make the question mandatory or optional for participants and assign the number of giveaway entries that action is worth.
Since your primary goal is to get users to submit your poll, I recommend making that action mandatory and awarding the highest number of entries for completing it.
If desired, you can add extra actions for users to complete to enter your giveaway. They can include joining an email list, visiting a URL, leaving a blog comment, or sharing your giveaway on social media.
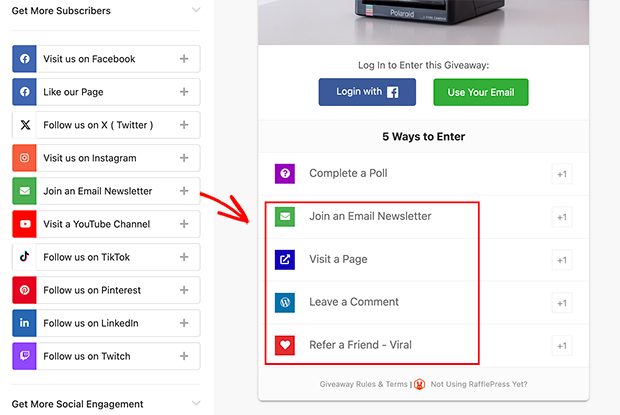
By offering more chances to win, you make your giveaway more attractive, which can result in more people completing your poll.
Now, click the “Design” tab to add some personality to your giveaway. Here, you can change the widget layout, choose custom fonts, and set custom button colors.
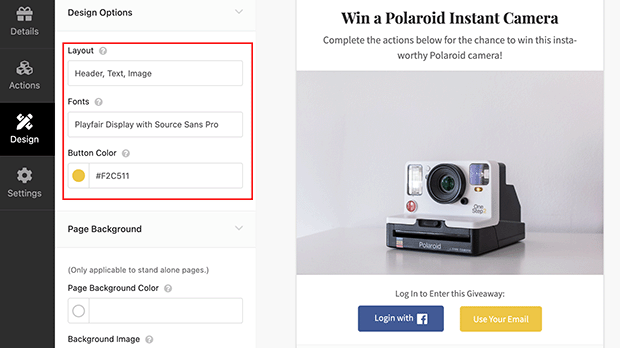
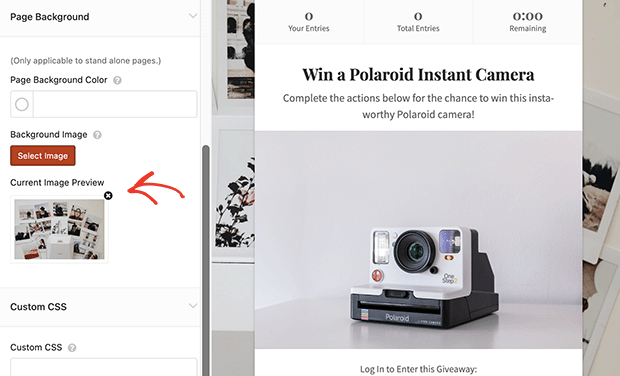
You can also choose a background color or upload a custom background image. This is ideal if you plan to use RafflePress’s giveaway landing page option.
You’ll find more customization options on the Settings page, including email verification, success tracking and redirection, and Recaptcha for spam protection.
The most important option in this tab is the “Giveaway Rules.” This is where you’ll outline the requirements and eligibility of your contest to ensure it’s fair, transparent, and legal.
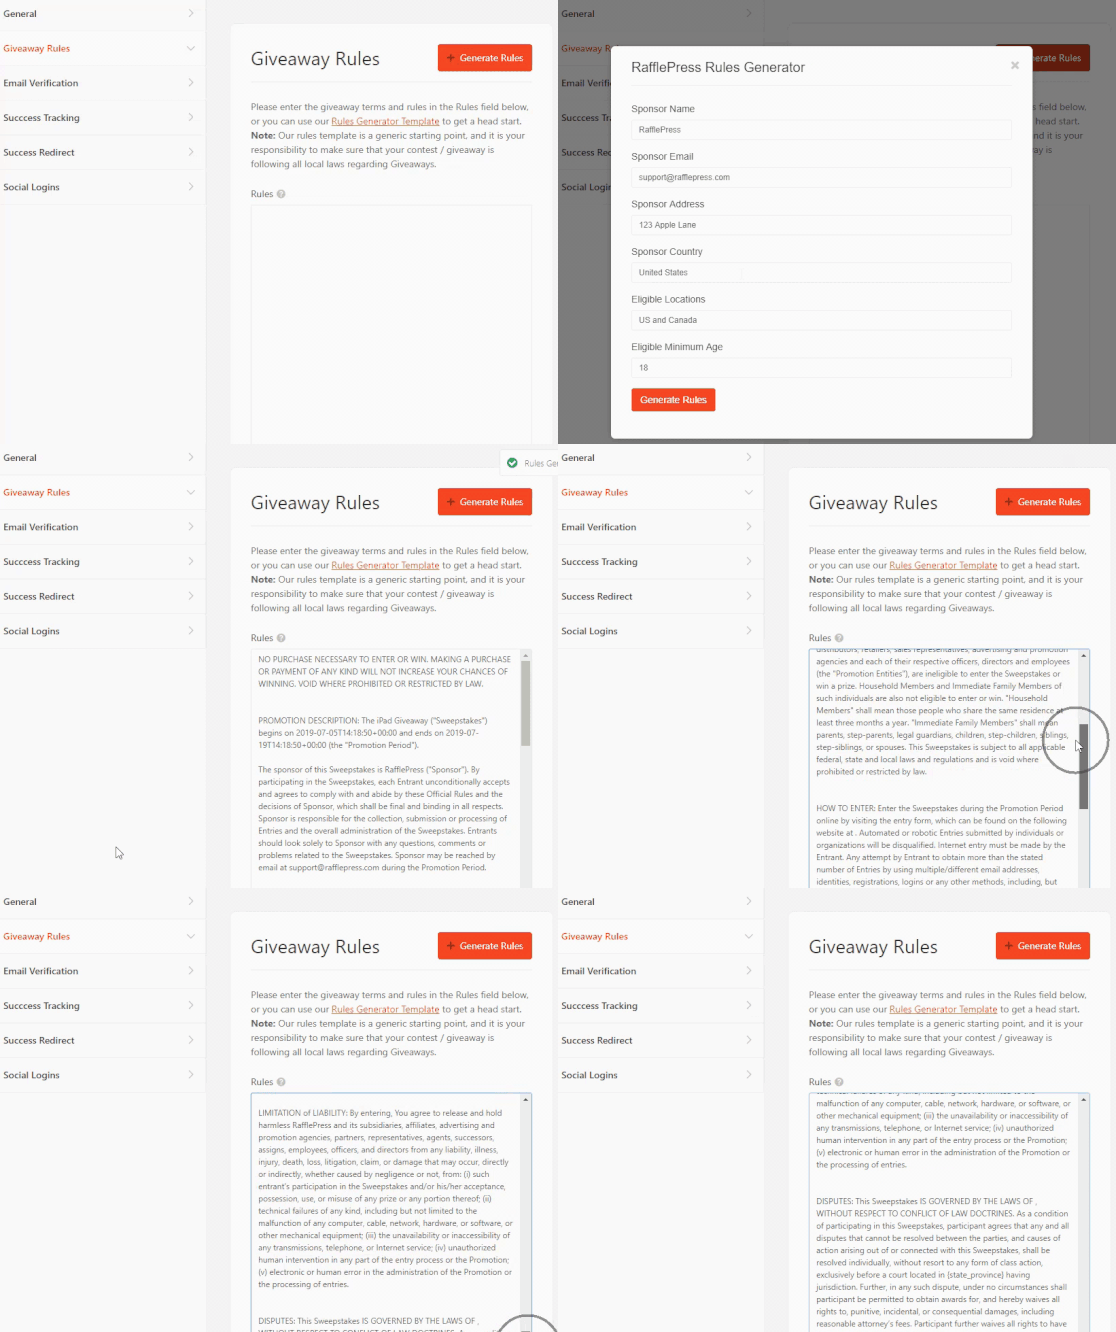
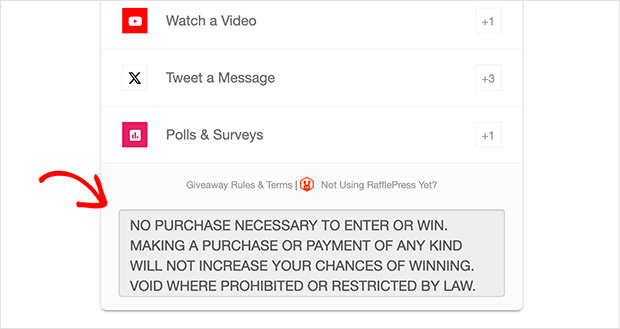
RafflePress has a built-in giveaway rules generator to make setting your rules easier. Simply answer some questions about your promotion, and the plugin will generate the rules automatically and display them on your giveaway widget.
When you’re happy with your giveaway, click the “Publish” button at the top of the builder.
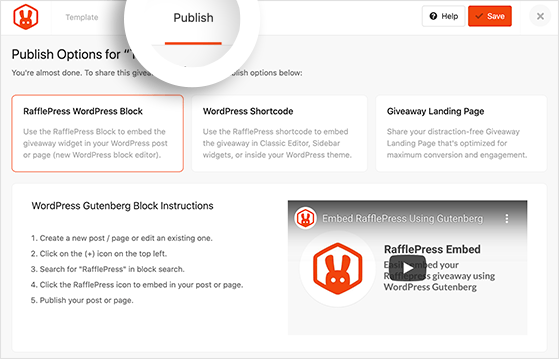
Here, you can choose from 3 methods:
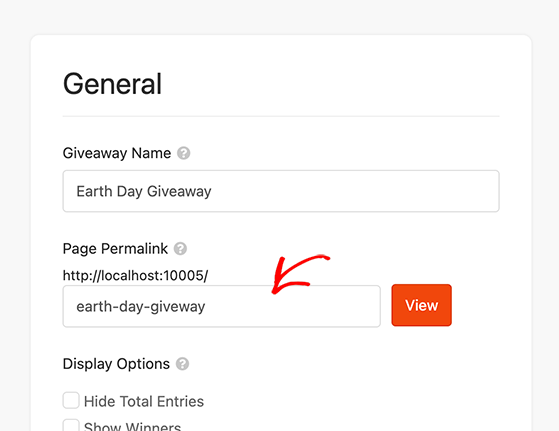
The giveaway landing page option is my top choice because it removes unnecessary distractions. It’s also the fastest way to get your poll live.
Simply assign a URL in the General Settings tab, and that’s it. When your promotion goes live, you can share that page to encourage your audience to participate.
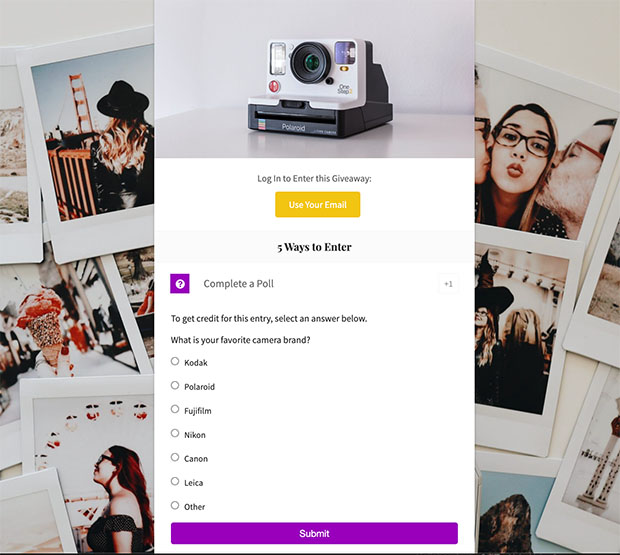
Here is an example of my poll on the front end of my test website:
Pro Tip: When your poll giveaway ends, ensure you draw the winners fairly. For the steps, see my guide on how to pick a winner of a giveaway.
Takeaway: WPForms gives you full control over how your poll looks and functions. It’s great for collecting votes, opinions, or feedback directly on your blog posts or landing pages.
WPForms is another excellent choice for creating a poll in WordPress and any other type of online form. It’s one of the best WordPress contact form builders, with over 6 million users.
I’ve used this plugin for 10 years and haven’t found a better solution for building high-quality forms. Its drag-and-drop builder is beginner-friendly, allowing you to change how your polls look without writing code.
To get started, you’ll need to install and activate WPForms Pro on your WordPress website. The Pro version includes the Surveys & Polls add-on, which you’ll need to create your poll.
If you need help with this step, see this guide on how to install a WordPress plugin.
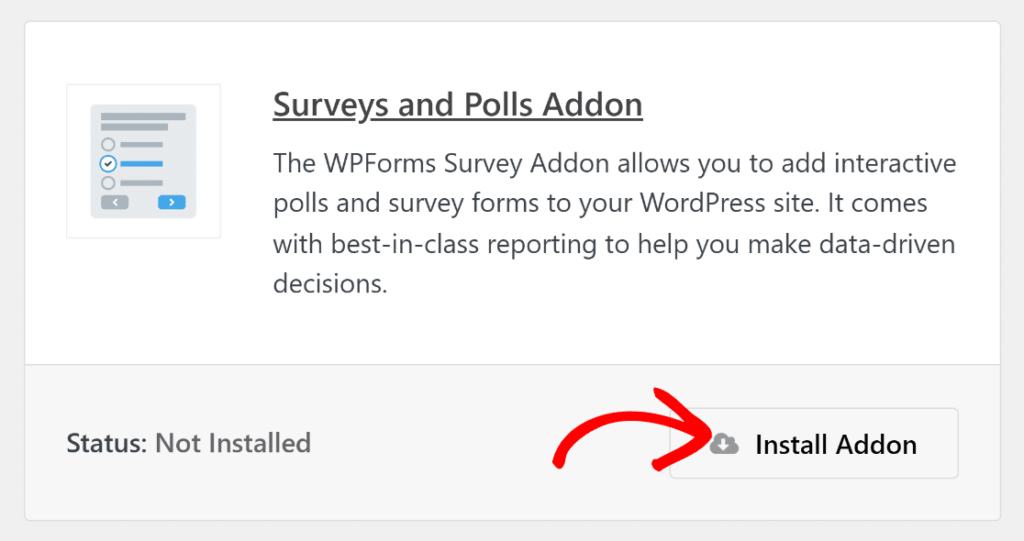
After activating the plugin, navigate to the Addons section to install the Surveys and Polls addon.
Next, go to WPForms » Add New to start building your poll-specific WordPress form.
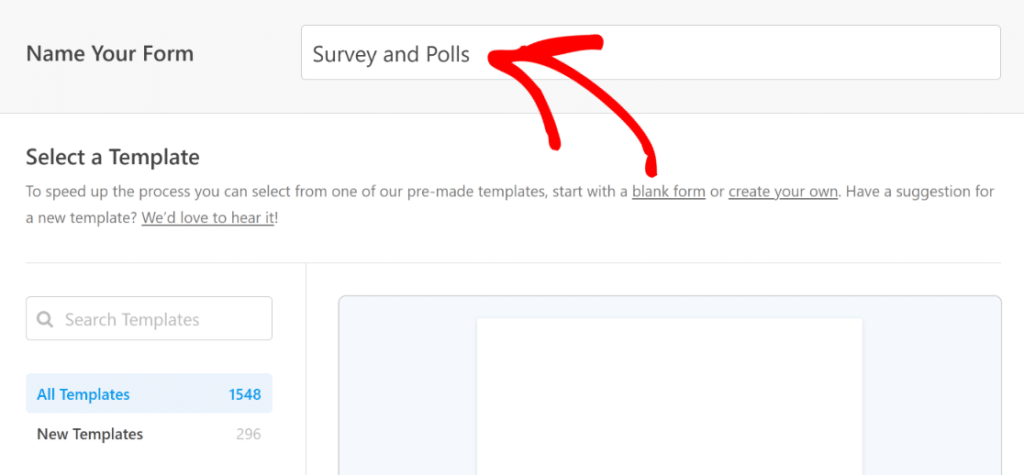
Give it a descriptive title, and in the search box, search for “Poll.” This will reveal several pre-made poll templates.
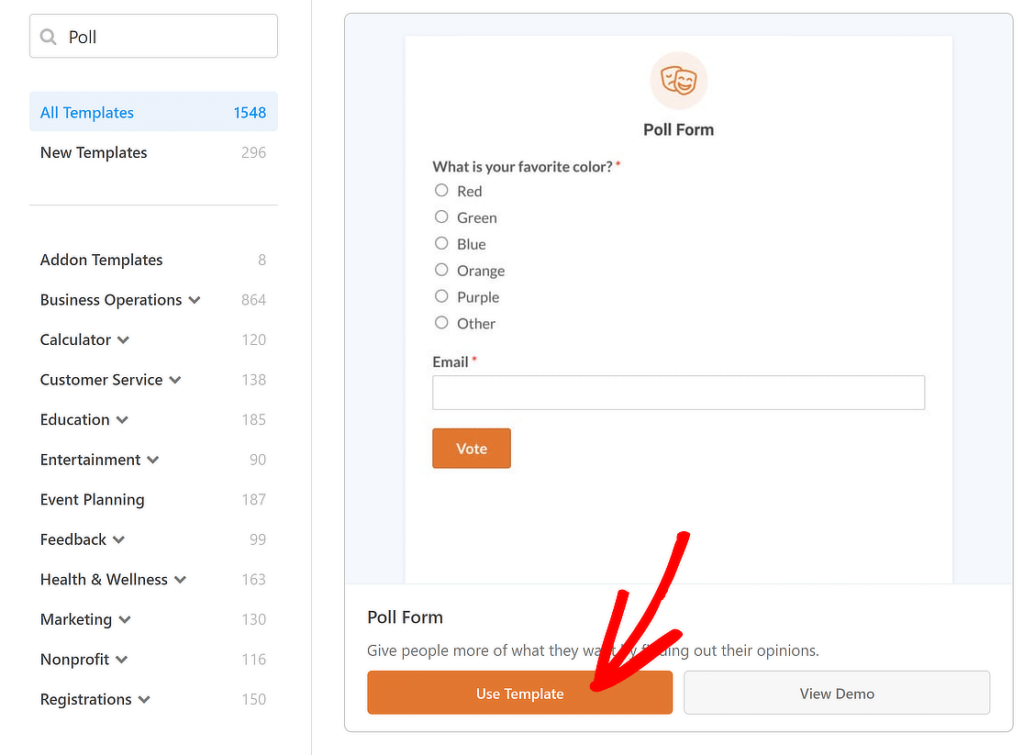
You’ll need the “Poll Form” template, so click it to choose that option.
WPForms’ form builder will open, allowing you to customize the poll questions, add new form fields, rearrange existing ones, and configure various settings.
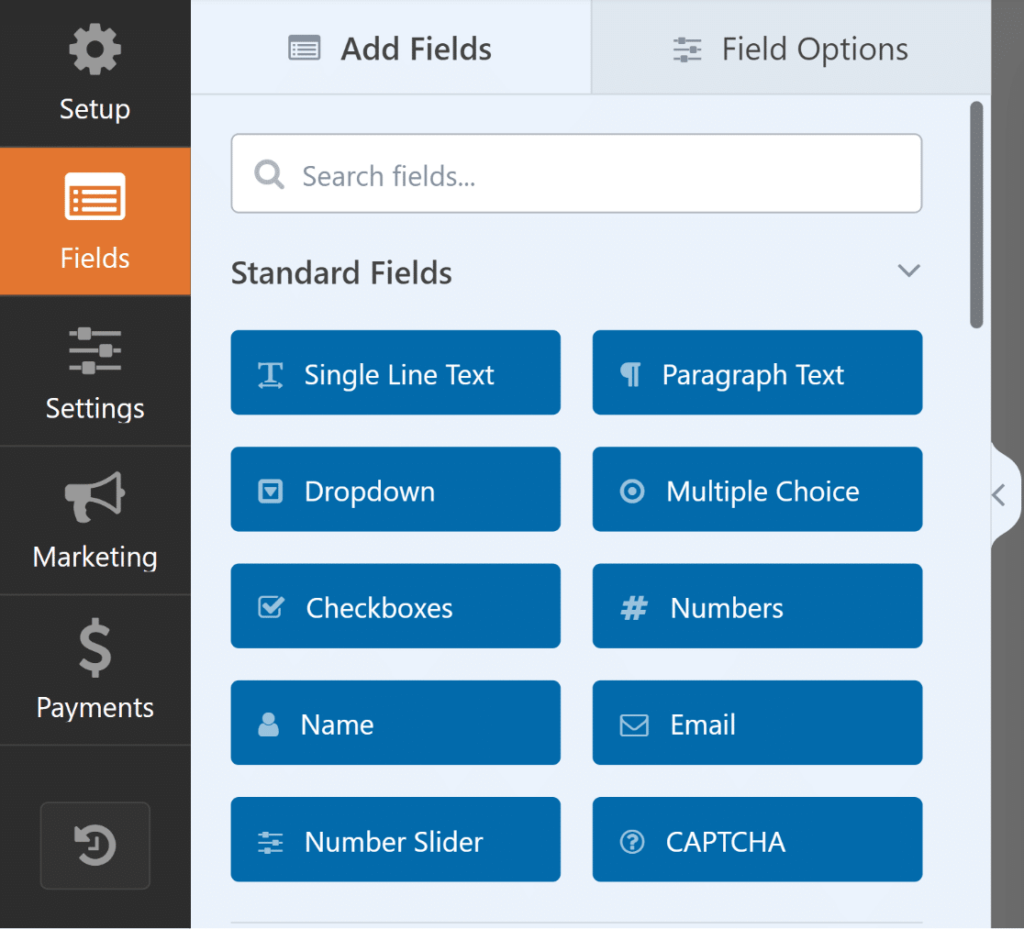
Explore the available options to tailor the poll’s appearance, behavior, and results display. For example, you can upload an image for each poll option.
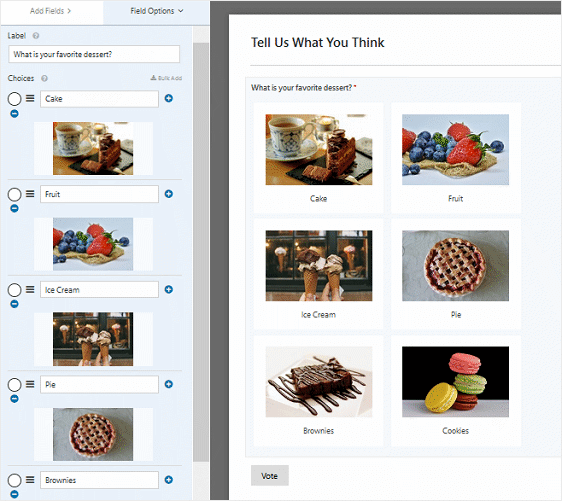
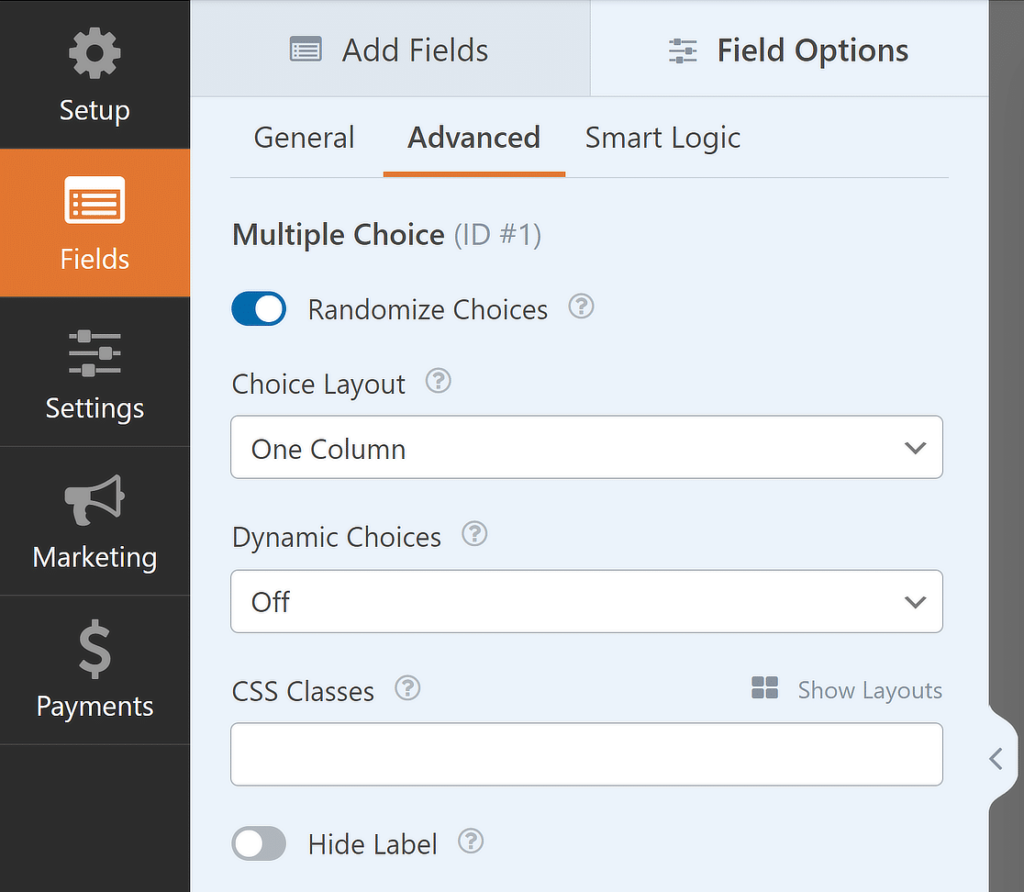
You can also randomize the poll questions to reduce order bias for your poll.
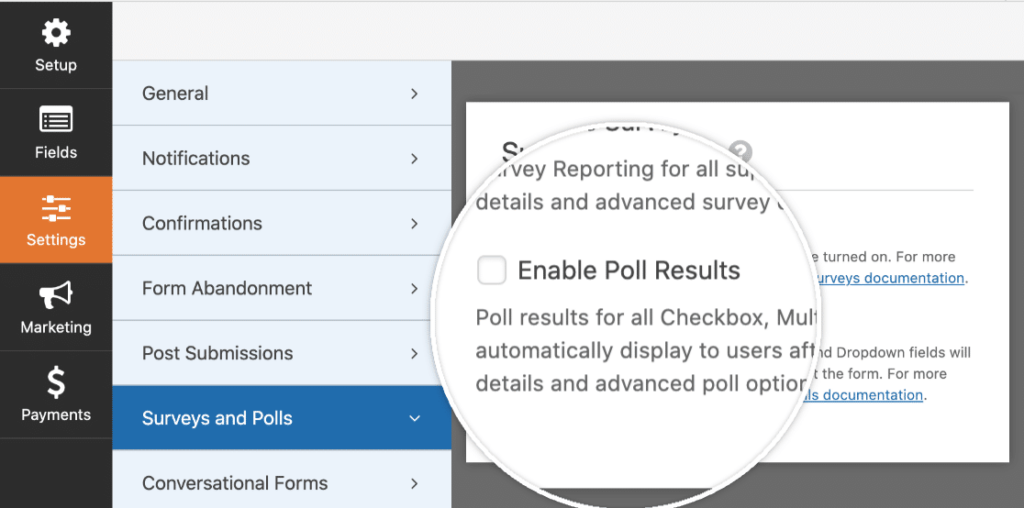
Chances are you’ll want users to see your poll’s results after they submit it. You can enable this option by visiting Settings » Surveys and Polls and choosing the “Enable Poll Results” checkbox.
Once you’ve done that, you’re ready to publish your poll. To do this, edit or create a new post or page and add the WPForms block.
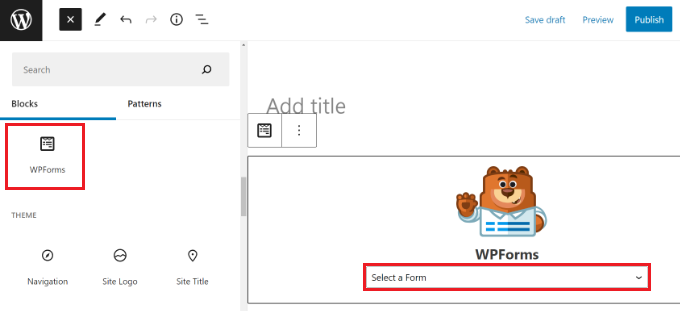
From there, select your poll form from the drop-down menu.
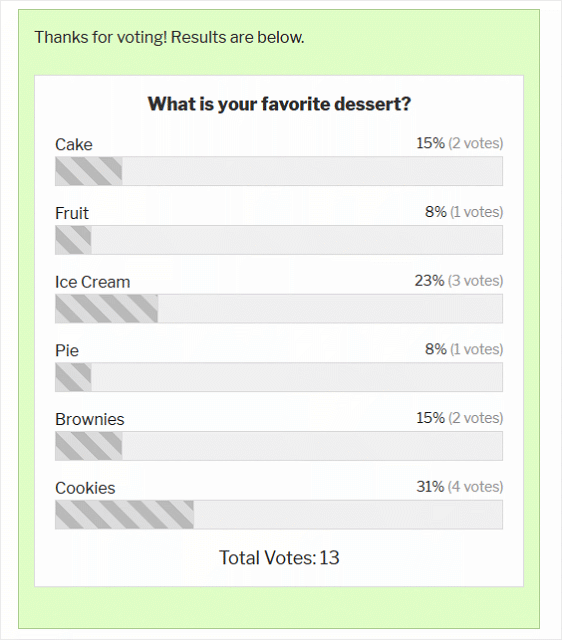
After updating or publishing, you can preview the form live on your website. Here’s an example of my poll results page to see how they look.
Takeaway: UserFeedback makes it super easy to show quick polls as popups. It’s the fastest option if you just want a simple yes/no or multiple choice question without building a full form.
The last method I’ll cover in this guide involves the UserFeedback plugin. It’s a popular WordPress poll plugin that lets you collect real-time feedback from website visitors.
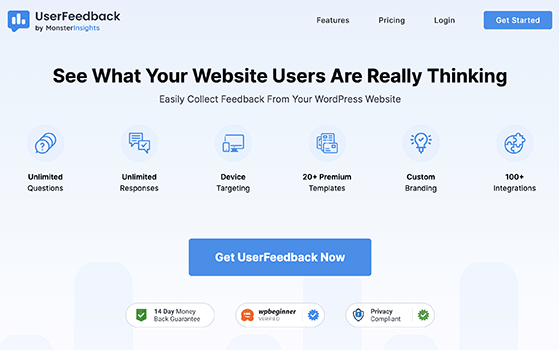
With unlimited popup polls and submissions, it’s an easy way to gather valuable feedback from your audience to help grow your business.
Start by downloading the UserFeedback plugin and installing it on your WordPress site. Once activated, the setup wizard will guide you through the initial configuration process.
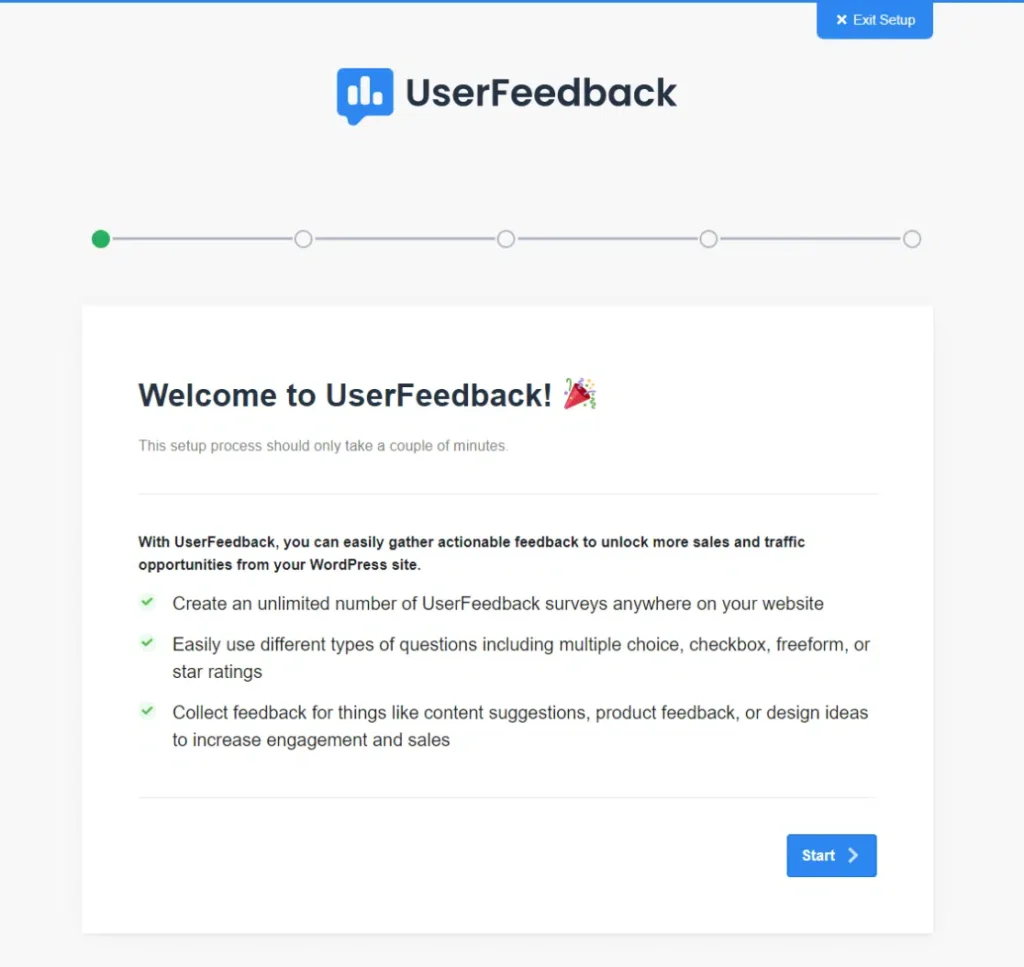
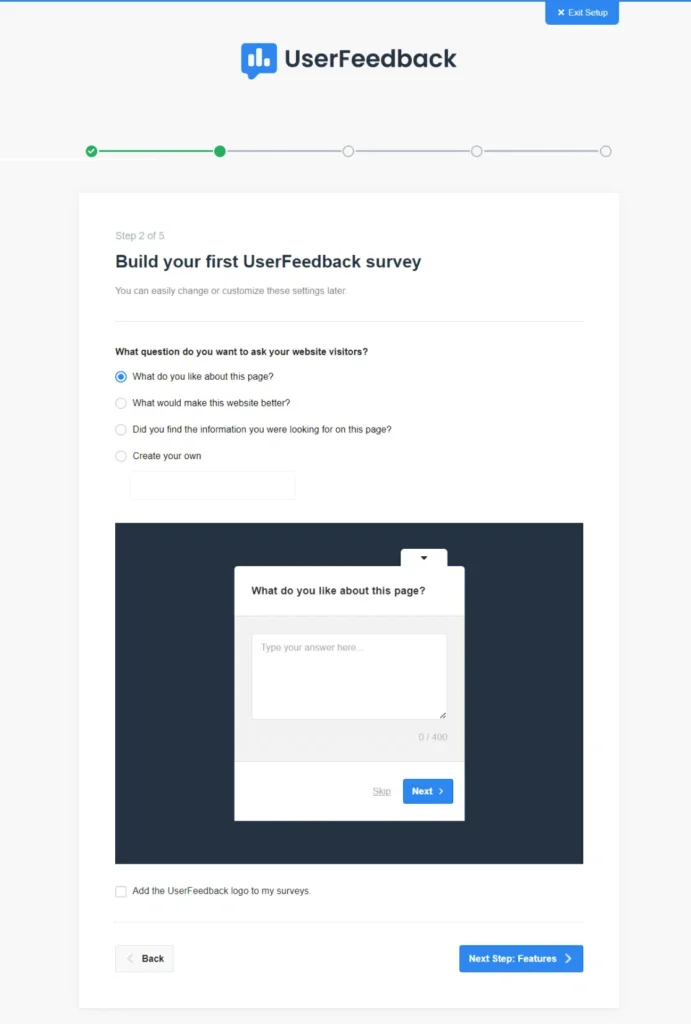
After setting up the plugin, follow the prompts to create your poll questions. You can select from preset options or create custom questions.
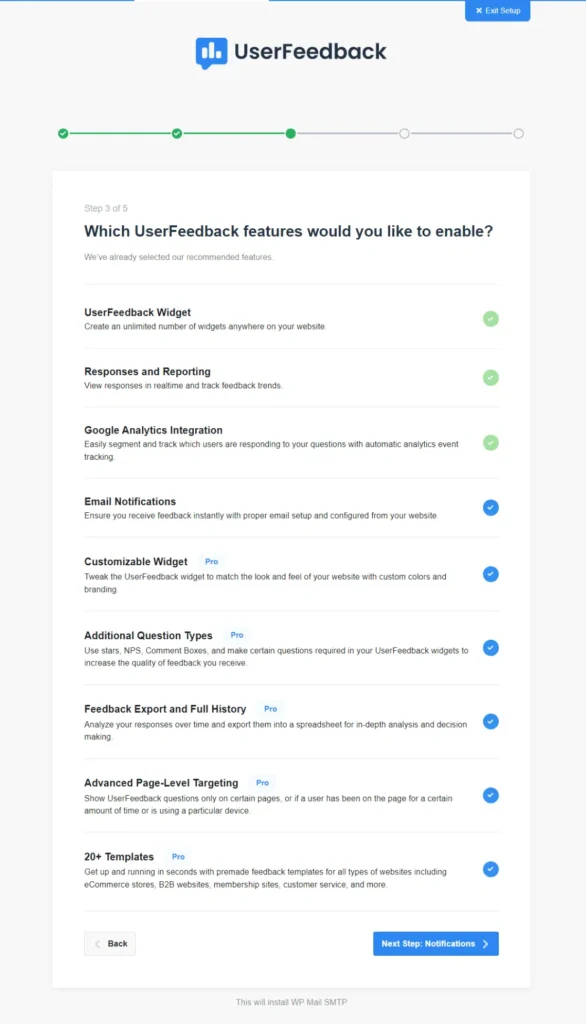
Next, explore the available features and enable the ones that align with your goals and audience preferences.
You can set up an email address on the next screen to receive survey responses and notifications.
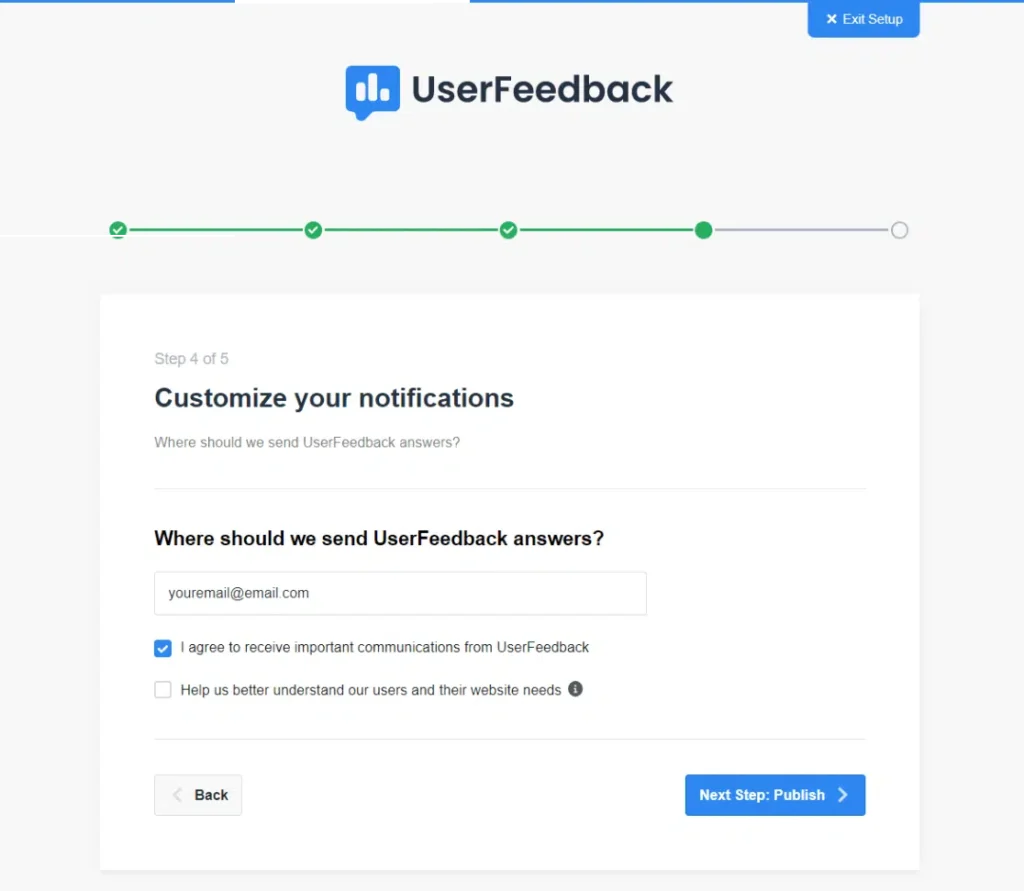
You can also receive updates and communications from the UserFeedback team to stay informed about new features and best practices.
After completing the setup process, UserFeedback will begin installing the features you chose earlier. When the installation is complete, click the Exit to Dashboard button.
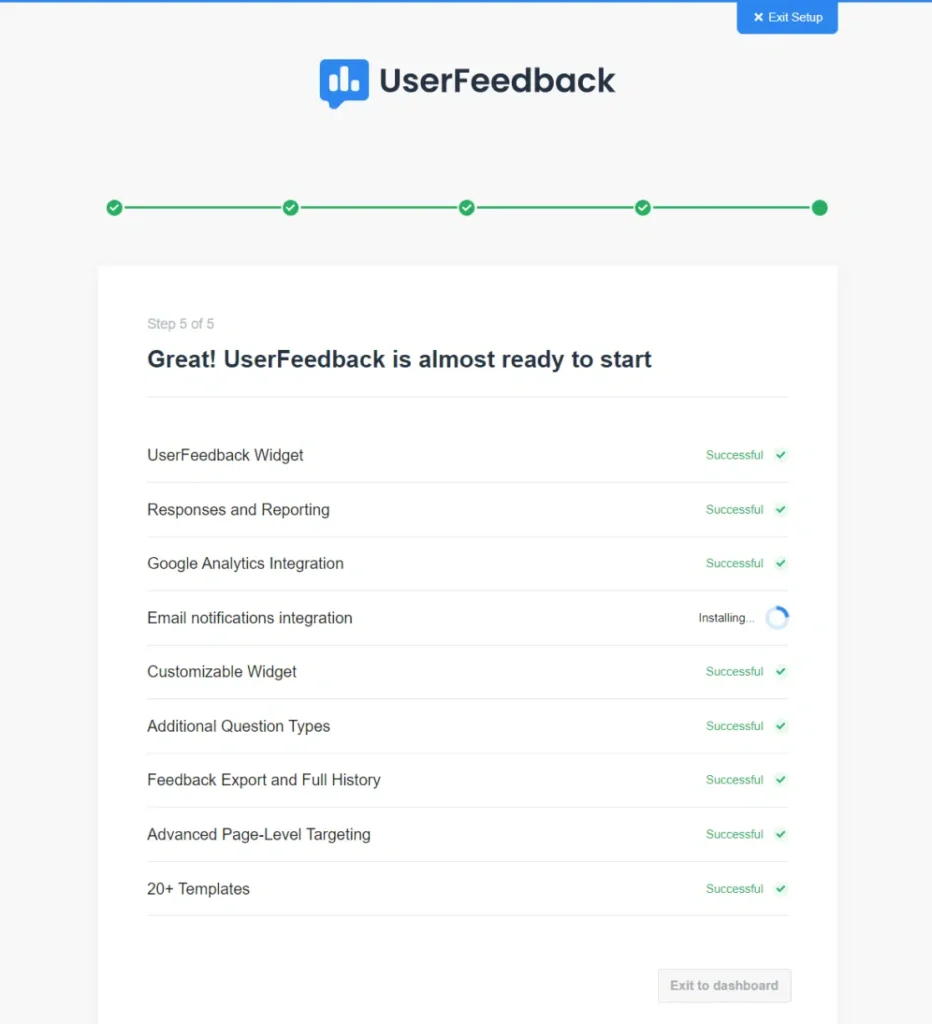
Your WordPress poll is now ready and published on your site.
Here’s an example of my demo poll, which will give you an idea of how it looks:
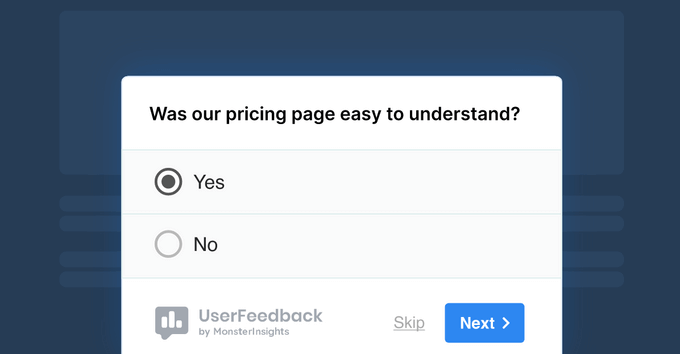
Before you add a poll, decide what you want to learn. Are you getting feedback on a product idea? Trying to boost engagement? A clear goal helps you write better questions.
Most people will only answer a few questions. Stick to one topic and limit your poll to 1–3 questions for the best completion rates.
Write questions at an 8th-grade reading level. Avoid jargon or complicated words — make it easy for everyone to understand and respond.
Make sure your options cover all likely answers without overwhelming people. Add an “Other” option if needed.
Put your poll where people will see it: a high-traffic post, sidebar, or giveaway landing page. You can also use a popup to get attention.
Don’t just publish and hope. Share your poll on social media, in your email newsletter, and across your site to get more responses.
Polls only help if you take action. Use the feedback to improve your content, update offers, or plan future blog posts.
I hope this guide has helped you learn how to create a poll in WordPress. Whether you choose RafflePress, WPForms, or UserFeedback, each option can help you engage with your audience, gather valuable feedback, and make data-driven decisions for your website’s success.
For more polling tips, check out my other WordPress tutorials:
If you liked this article, please subscribe to our YouTube Channel for RafflePress video tutorials. You can also find us on Twitter and Facebook.
Disclosure: Our content is reader-supported. This means if you click on some of our links, then we may earn a commission. We only recommend products that we believe will add value to our readers.
Copyright © 2024 SeedProd LLC. RafflePress® is a registered trademark of SeedProd LLC