New Update: Boost Social Proof with Reviews & Automation
New Update: Boost Social Proof with Reviews & Automation

 John Turner
 John Turner
Want to learn how to add Facebook Pixel to WordPress?
Boosting visibility and engagement is easy with a Facebook tracking pixel. This tiny tool tracks visitor behavior and helps enhance your Facebook ad campaigns.
Don’t worry if tech’s not your thing – we’ll show you how to add Facebook Pixel to WordPress in simple steps for beginners.
Ever wonder how Facebook ads seem to know you so well? That’s the work of the Meta (Facebook) Pixel. It might sound mysterious, but it’s pretty straightforward.
The Facebook Pixel is a tiny piece of code that tracks what people do on your website and Facebook ads. It notes visitors behavior, like the pages they see, the items they put in their cart, and even when they complete a purchase. This helps you know your audience better.
Note: There is no physical “Pixel” as such. Instead, it’s the process where Facebook collects data from your website to optimize your ads and serve them to the right audience.
A Facebook pixel helps you measure the success of your ads by tracking visitors’ actions on your website. It gives you valuable insights you can use to target users more likely to respond to your ads.
You can use this data to create similar audiences for future campaigns.
Additionally, retargeting is an effective way to increase clicks and conversions. According to the research, Facebook ads have an average conversion rate of 9.21%.
Ready to dive in? Let’s learn how to add Facebook pixel to WordPress, step-by-step.
To get started, you’ll need to log into your Facebook account and head to the Meta Business Suite.
Next, click All Tools » Event Manager.
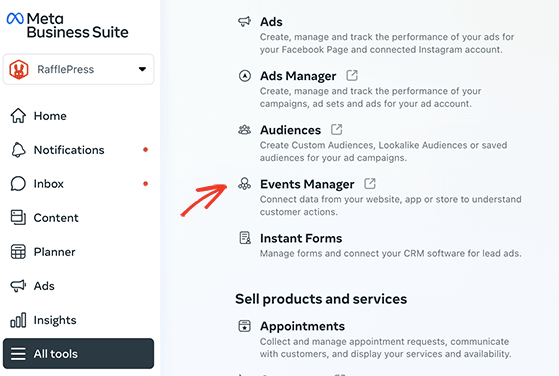
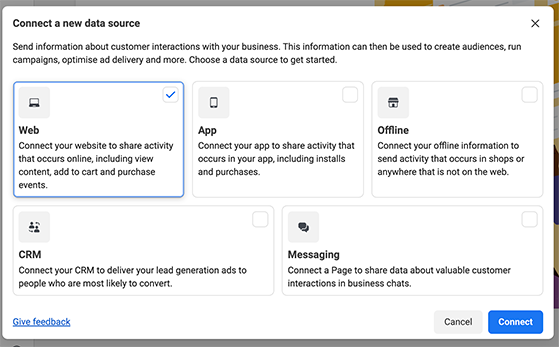
From the left-hand sidebar, click the + Connect Data Sources button, choose the ‘Web’ option, and click the Connect button.
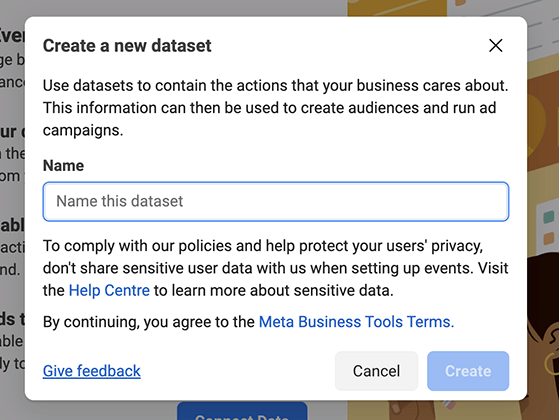
When the pop-up window appears, choose a name for your data set and hit Create.
In the following screen, type in your website’s URL and click the Check button. This action will see if your site is compatible with partners like WordPress, Shopify, etc.
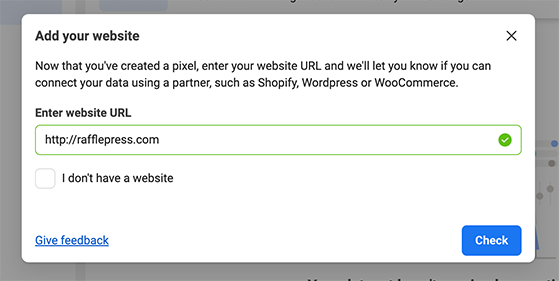
If you get a green checkmark, your site is good to integrate, so click on Next to forge ahead.
Now you’ll need to decide how to connect your site to Facebook. For this guide, we’ll pick the ‘Meta Pixel only’ choice. However, you can add the Conversion API anytime.
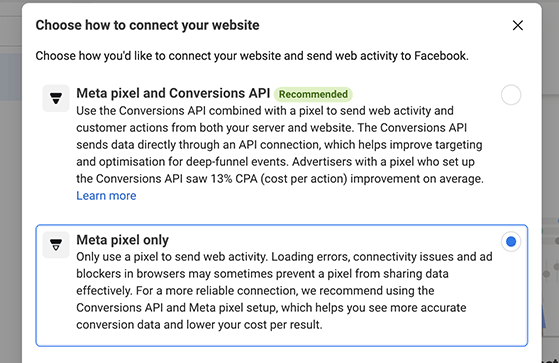
Click on Next to continue.
You then need to decide how to add the Facebook pixel to WordPress. If you have a tech-savvy team member, you can email them the pixel code.
However, if you want to do it yourself, click the Install Code Manually button.
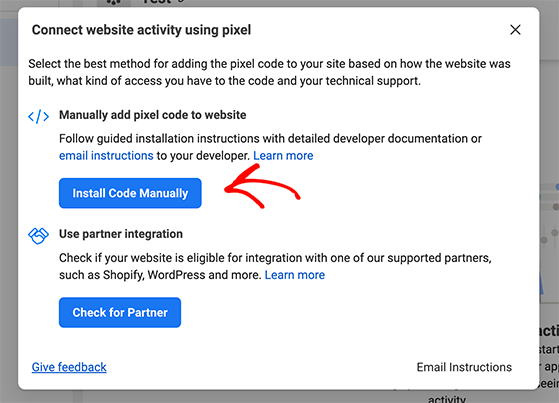
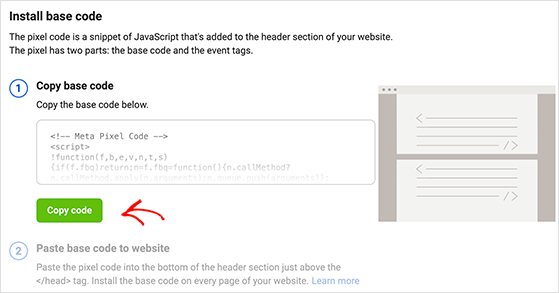
Next, Facebook will display the pixel base code for your site. Click Copy Code to save the pixel tracking code, and we’ll guide you on how to configure it in WordPress next.
Adding your Facebook Pixel to WordPress is simpler than it sounds. Below we share three different methods to choose from that cater to various skill levels and needs.
Using pixel tracking in a giveaway is an excellent way to retarget site visitors with Facebook ads and RafflePress, the best WordPress giveaway plugin, has an easy way to do it.
With this plugin, you can run engaging giveaways and contests to boost your traffic, grow your social media followers, and increase brand awareness.

Using RafflePress with your Facebook pixel lets you engage users with exciting giveaways while gathering valuable visitor data. This data is a treasure chest for crafting more effective Facebook ads.
With its easy-to-use Success Tracking feature, you can monitor how visitors interact with your giveaway. This gives you the knowledge to tweak your campaigns and get the best bang for your buck.
To get started, install and activate the RafflePress plugin and create a new giveaway. If you need help with this, you can see our guide on how to create an online contest.
After setting up your giveaway, navigate to the Settings tab and click on Success Tracking. Here, you can paste your Facebook Tracking pixel into the ‘Conversion Scripts’ box and click Save.
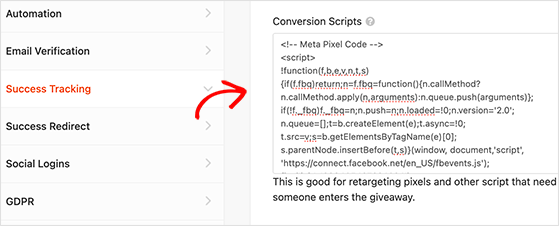
RafflePress will now track each person who enters your giveaway through your Facebook Pixel. Based on this data, you can create custom audiences for your ads, leading to highly focused retargeting strategies.
If you need an easy solution to monitor and retarget Pay-Per-Click (PPC) ads, MonsterInsights, the best Google Analytics plugin for WordPress, is a smart choice.

With its user-friendly interface, it lets you add, customize, and manage Google Analytics in WordPress without code. You can track your site’s performance and pageviews, learn how visitors use your site, and much more.
Plus, using the Facebook Pixel this way offers a deeper understanding of your audience. You can learn details like their age, location, and interests to refine your marketing strategy for more effective outreach.
If you’re not using it yet, you can follow this step-by-step guide to add Google Analytics to WordPress with MonsterInsights.
Once MonsterInsights is activated, you’ll need to install the Ad Tracking addon.
To do this, navigate to Insights » Addons from your WordPress admin, scroll down until you find the PPC Tracking option, and click Install.
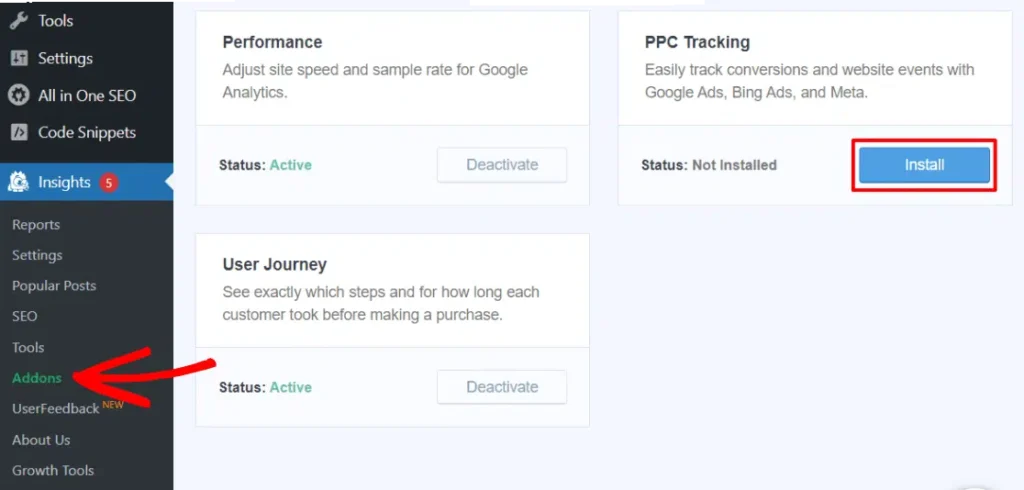
Once the addon is installed, you’re ready to add your Facebook tracking pixel to WordPress.
Now, head back to your WordPress dashboard and go to Insights » Settings » Conversions.

Here, you’ll need to enter your Facebook Pixel ID. This is the unique identifier given to your Facebook Pixel when you first create it in Facebook Business Manager.

Locate and copy your Facebook Pixel ID and, then on the Conversions panel in MonsterIsights, scroll down until you see the Ads Tracking box.
Here you can paste the ID you just copied into the ‘Pixel ID’ field and save your changes.

This method is handy for those running PPC ads, as it allows you to track Meta ad conversions on various platforms like WooCommerce, Easy Digital Downloads, and more.
If you’re hands-on and comfortable working with code, the WPCode plugin is ideal for adding the facebook pixel to WordPress.
WPCode (formerly the Insert Headers & Footers plugin) is an easy plugin that lets you drop code snippets into WordPress. That way, you can place tracking pixels for platforms like Facebook and Google ads without editing your theme files.
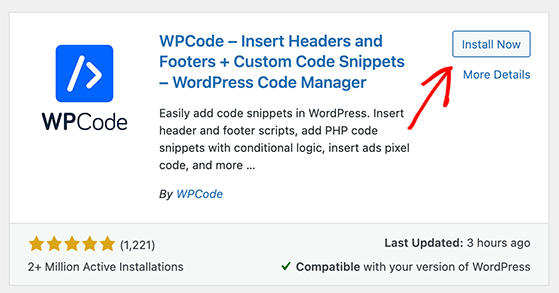
To get started, hover over the Plugins tab in your WordPress dashboard and click Add New.
In the search box, type ‘WPCode’ and hit enter, then click Install, then Activate.
After installing and activating the plugin, head to Code Snippets » Header & Footer from your WordPress admin and paste your Facebook pixel code into the Header box.
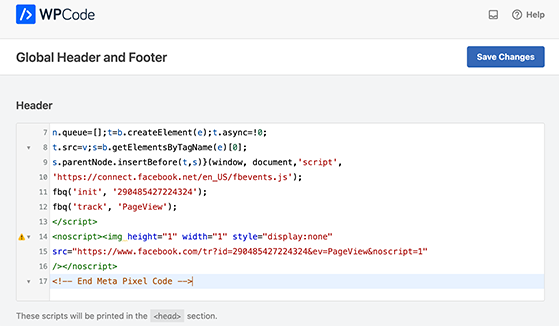
Now click the Save Changes button, and your Pixel should be ready.
Now that you’ve learned how to add Facebook pixel to WordPress, it’s time to see if it’s installed correctly and communicating with Facebook.
The easiest way to test your tracking pixel is with Facebook’s Pixel Helper. This free Chrome extension detects pixels and offers handy error reports.
Here’s how to install it:
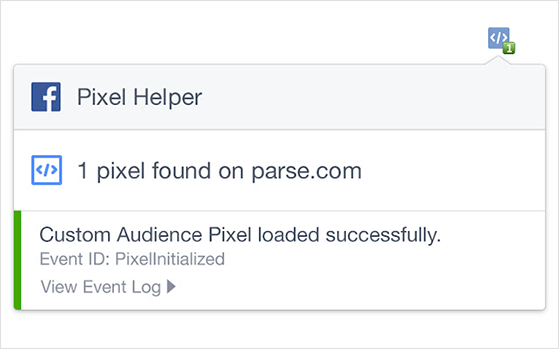
With the Facebook pixel set up on your WordPress site, you’re ready to reconnect with your audience by retargeting your visitors with Ads. Here’s how:
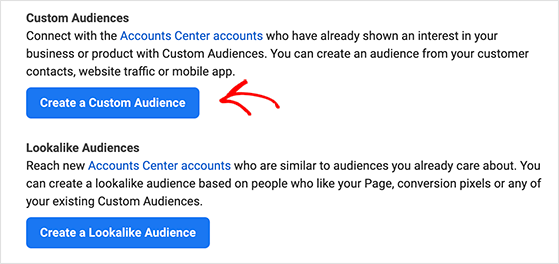
Open your Facebook Ads Manager and click on the Audiences option then Create a Custom Audience.
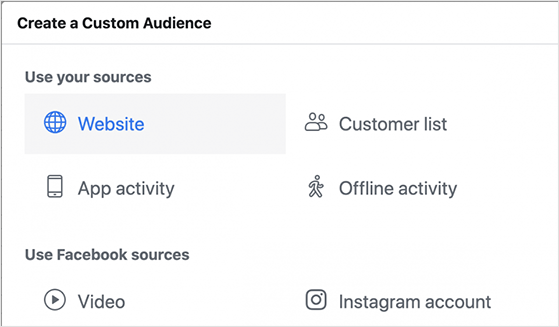
From there, pick the ‘Website’ option.
Facebook will ask you which audience you want to target. You can choose all website visitors, people who visit specific pages, or visitors by time spent.
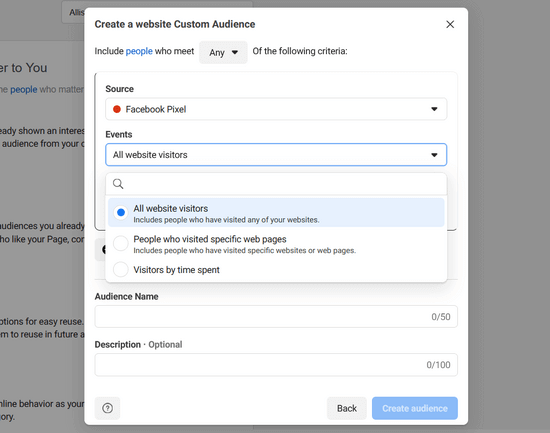
Next, choose a duration and give the audience a name. When you’ve done that, click the Create Audience button to finish.
Tips to Retarget with Facebook Ads:
That’s it! We’ve just shown you how to add Facebook pixel to WordPress. By now, you should understand that a tracking pixel is a handy tool that can take your targeting strategy to the next level. Whether it’s for a giveaway event, PPC campaigns, or for those who enjoy working with code snippets – we’ve covered it all.
If you’re looking for more ways to level up your WordPress website, you may find the following tips and tutorials helpful:
If you liked this article, please subscribe to our YouTube Channel for RafflePress video tutorials. You can also find us on Twitter and Facebook.
Disclosure: Our content is reader-supported. This means if you click on some of our links, then we may earn a commission. We only recommend products that we believe will add value to our readers.
Copyright © 2024 SeedProd LLC. RafflePress® is a registered trademark of SeedProd LLC