New Update: Boost Social Proof with Reviews & Automation
New Update: Boost Social Proof with Reviews & Automation
 John Turner
 John Turner
Do you want to send WordPress push notifications to your visitors in real time?
WordPress push notifications are clickable alerts that appear on a user’s desktop or mobile device, even when they’re not on your site. They’re a powerful way to bring people back, promote new posts, and boost sales.
In this step-by-step guide, I’ll show you exactly how to set up and send push notifications from WordPress using a beginner-friendly plugin, so you can grow traffic and engagement on autopilot.
Push notifications are small clickable popup messages that appear to users on their desktop or mobile devices.
Web push notifications typically appear at the top of your desktop or in the notification area of your mobile device. Moreover, users can receive push notifications even if their browser isn’t open.
Here is an example of a desktop push notification in Windows 10:

In essence, push notifications help you reach your audience across devices with recent updates and offers while turning them into loyal followers and customers.
It’s a simple fact that 70% of your website visitors will leave and never return. So converting those visitors into subscribers and customers should be one of your top priorities.
While many website owners rely on email marketing to capture leads, push notifications have a much better track record:
Popular websites like Facebook, Pinterest, LinkedIn, and many others understand the importance of push notifications and are already using them. Not only do they have higher open and click-through rates, but they’re also more engaging than SMS, email, and social media marketing.
Having said that, let’s look at how to add WordPress push notifications to your website.
The easiest way to send notifications from your WordPress site is with a WordPress push notification plugin or service.
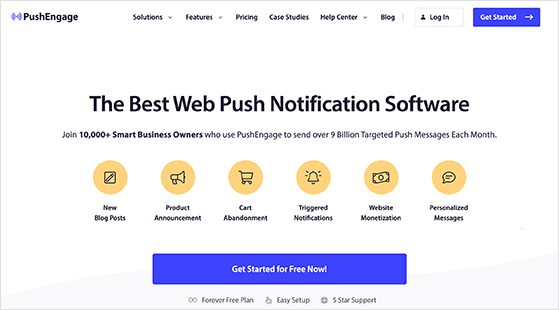
PushEngage is among the best push notification software and multi-channel engagement platform that supports WordPress websites. It lets you add automatic push notifications to WordPress easily and supports major web browsers, including:
PushEngage is our favorite solution because it’s easy to use, includes many customization options, has multiple targeting features, and lets you send unlimited notifications. Moreover, this freemium tool supports various platforms, including WordPress, WooCommerce, Shopify, and more, making it an ideal tool for recovering abandoned carts.
Whether you want to reach your audience with new blog post updates or broadcast your new eCommerce sale, PushEngage is the best and easiest solution. Follow the steps below to add web push notifications to your site with PushEngage:
Let’s dive in.
The first step is to visit the PushEngage website and choose a plan that suits your business goals. For this guide, we’ll use the free plan.
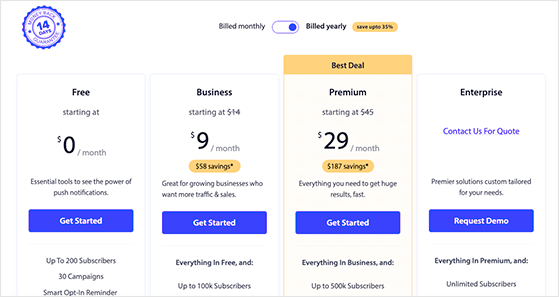
After choosing your plan, follow the instructions to register your new PushEngage account.
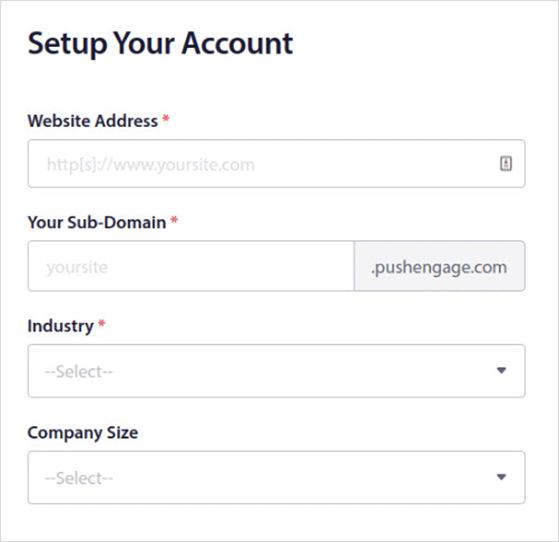
Once your account is active, you’ll automatically head to the PushEngage dashboard. The first thing you’ll see is the PushEngage challenge which guides you through setting up push notifications on your website step-by-step.
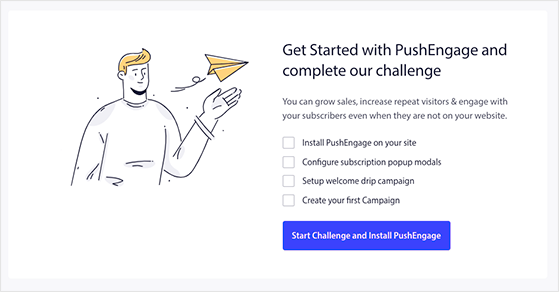
Click the Start Challenge and Install PushEngage button to get started.
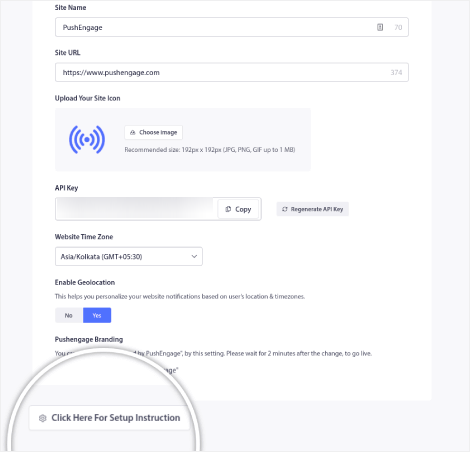
The first tooltip directs you to the Site Settings » Site Details page, where you can fine-tune your website information and upload a logo. At the bottom of the page, you’ll see a button asking you to “Click Here for Setup Instructions,” so click it to view the steps to add PushEngage to your WordPress site.
Because we’re adding push notifications to WordPress, you’ll need to click the WordPress tab on the following page.
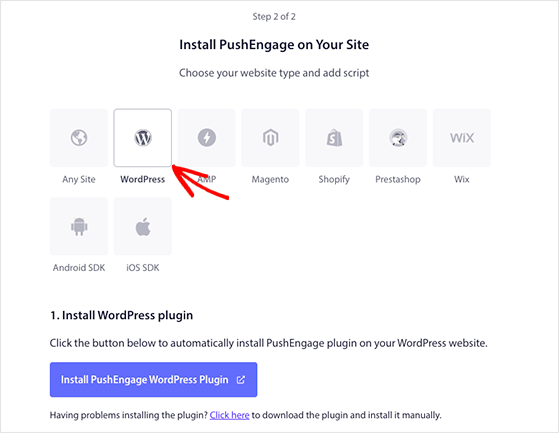
You can then click the Install PushEngage WordPress Plugin button to install PushEngage on your WordPress website automatically.
Note: PushEngage will install the plugin automatically because you already synced your website during the setup process.
After installing the plugin, copy the API Key from the installation screen, which you’ll add to your PushEngage plugin in the next step.
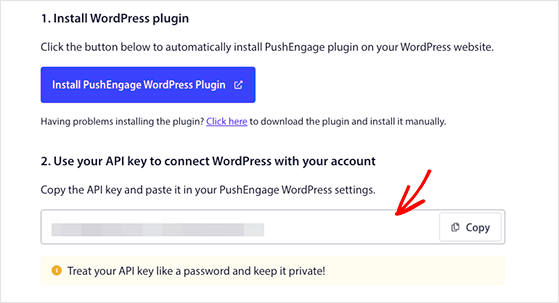
The next step is to visit your WordPress dashboard and click the PushEngage icon. On the next screen, click the Setup tab, paste your API key into the relevant field, and click Submit.
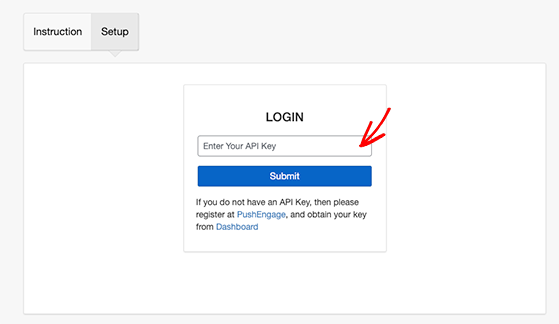
Your WordPress site is now connected to PushEngage, and you’ll see a page like the one below.
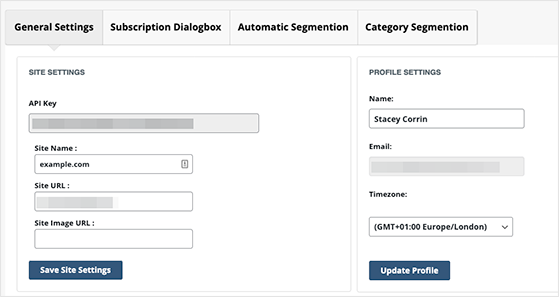
This screen has some useful options you may like to configure. For example, you can set PushEngage to automatically send a push notification whenever you publish a new post.
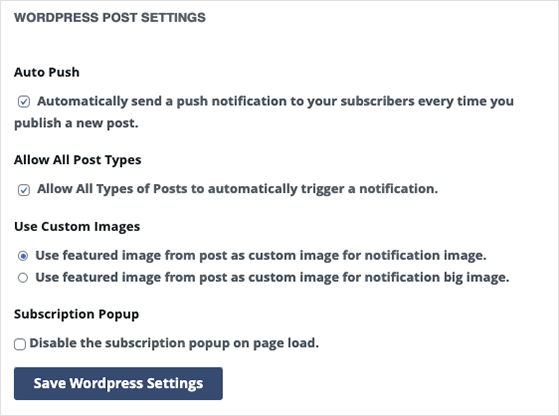
Browse through the settings and ensure you save any changes before moving on to the step.
To send push notifications to your followers, you’ll need to add a way for website visitors to subscribe. In PushEngage, users can opt-in to receive notifications through a discreet popup box, which PushEngage calls Popup Modals.
To set up your subscription box, go to Design » Popup Modals from your PushEngage dashboard and choose a Popup Modal design.
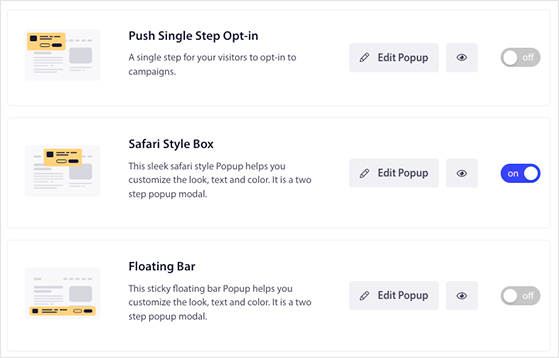
You can then click the Edit Popup button to customize your subscription box to match your website’s branding.
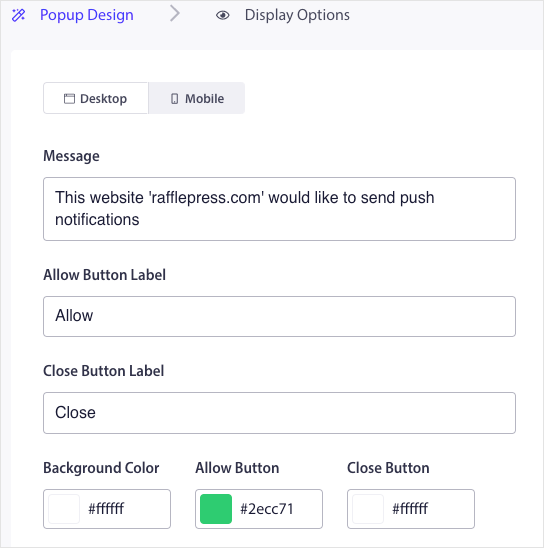
For instance, you can edit:
In the Display Options tab, you can set when your subscription box displays to visitors, such as after a few seconds delay or after the user scrolls down your page.
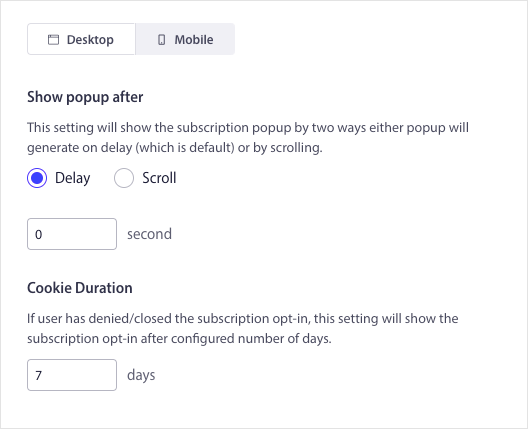
Additionally, you can show your subscription popup when visitors click on elements like a button or link.
When you’re happy with your design, click the Save and Enable Popup button.
Next, you’ll want to set up a welcome message for new push notification subscribers. Creating a welcome message is a helpful way to test that your notifications work because it will appear after new followers subscribe.
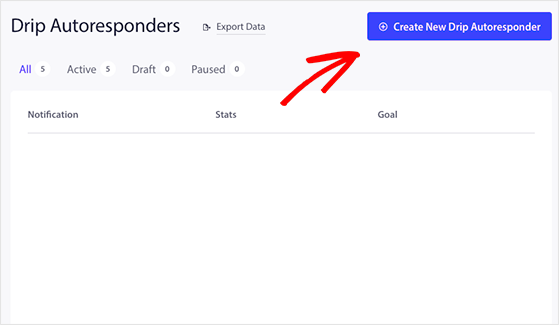
To set up a welcome notification, go to Campaign » Drip Autoresponders from your PushEngage dashboard and click the Create New Drip Autoresponder button.
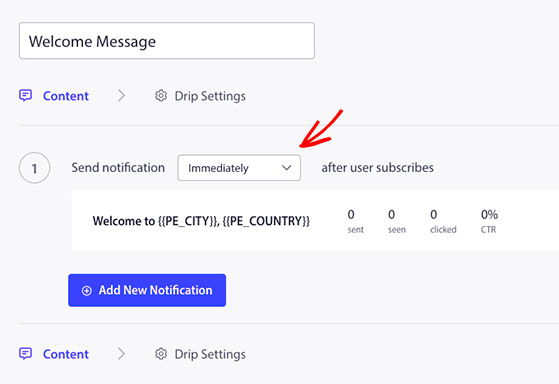
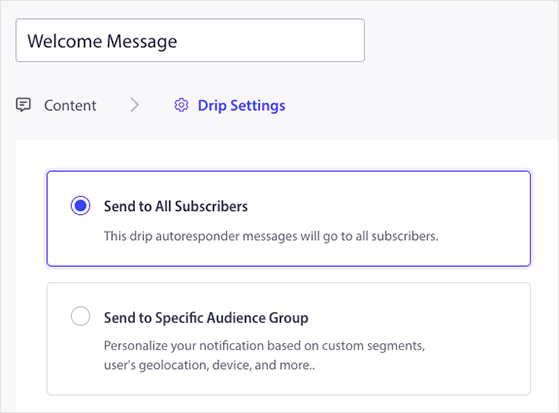
Next, give your notification a sensible name, such as “Welcome Message,” and select “Immediately” from the Send Notification dropdown menu.
Now you can click the Drip Settings button and choose who will see your welcome message. You can send your welcome notification to all subscribers or a specific audience group. For this example, we’ll select the All Subscribers option.
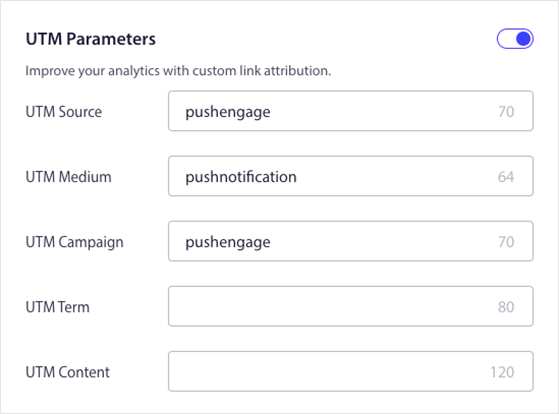
After that, scroll down to the UTM Parameters section and customize your UTM campaign information. This will help you identify your push campaigns in Google Analytics with custom link attribution.
When you’re ready, click the Activate Autoresponder button to run your welcome message.
Once you have some push notification subscribers, you can start sending notifications for new blog posts, business updates, sales, and more.
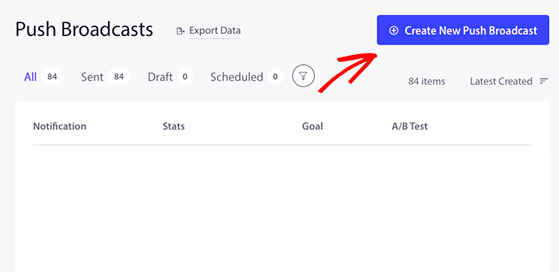
To send your first push notification, go to Campaign » Push Broadcasts from your PushEngage dashboard and click the Create New Push Broadcast button.
On the next screen, you can start creating your notification message. Start by adding a notification title, message, and the link you want subscribers to click.
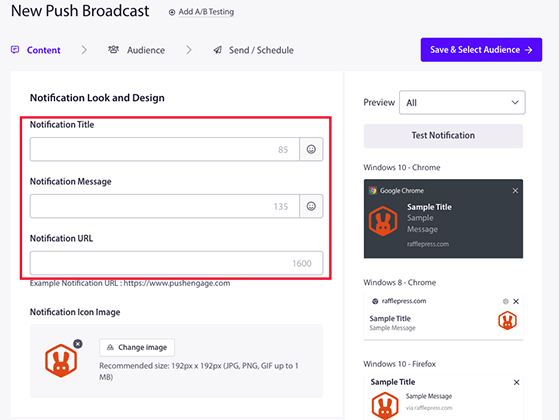
After that, you can add a large image to grab attention, enable multiple call-to-action (CTA) buttons, and set how long users will see your notification before it expires.
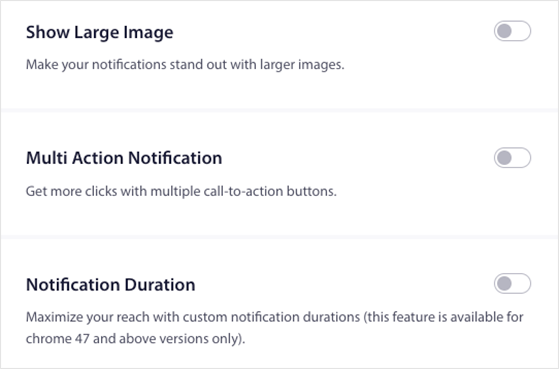
Next, add your UTM parameters, as you did for your welcome message, then click the Save and Select Audience button.

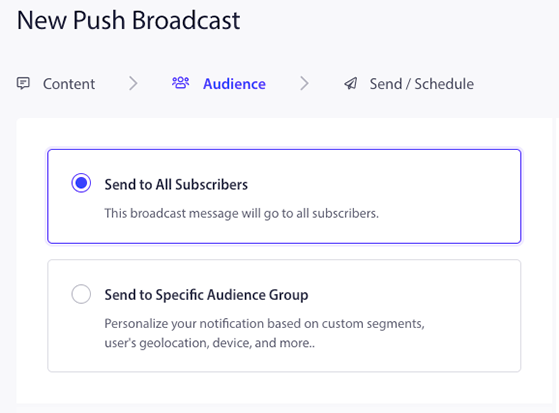
You can send your first notification to your entire audience or a specific group of subscribers. Then you can click the Send/Schedule button.
On this screen, you can send your notifications immediately, at a specific date and time, or create a recurring notification.
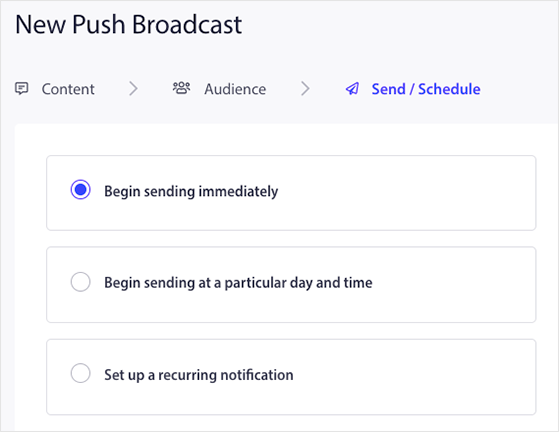
When you’re ready to send your WordPress push notification, click the Send Notification Now button. PushEngage will start sending your notifications based on your schedule.
You now know how to add push notifications to your WordPress site and have sent your very first message. Congratulations!
Looking for another way to skyrocket your business success? Follow this guide on how to use contest marketing to grow your business.
If you liked this article, please subscribe to our YouTube Channel for RafflePress video tutorials. You can also find us on Twitter and Facebook.
Disclosure: Our content is reader-supported. This means if you click on some of our links, then we may earn a commission. We only recommend products that we believe will add value to our readers.
Copyright © 2024 SeedProd LLC. RafflePress® is a registered trademark of SeedProd LLC